The procedure in this topic describes how to enter detailed information on pax for a new FIT Booking.
Booking Name vs Pax Names
A booking is referred to by its name; i.e. the Booking Name. As well as the Booking Name, Pax Travelling contains detail of the number and type of pax (adults, children and infants), plus the room configuration. This information is used by Tourplan to automatically cost the services when they are added to the booking.
Individual Pax names and age classifications can be included. Tourplan does not need pax names for costing, however, they can be included on documentation such as vouchers and invoices.
NOTE: Having different name levels means that different documentation can use names in a different format. For example, the Booking Name (e.g. Brown/Smith Party) could be used on messages to suppliers and the Pax Name(s) could be printed on Vouchers, Itineraries and Room Lists.
Room Configurations
Pax are allocated to a room record – a different record is required for each separate room in the booking. Room configurations must accurately reflect the type(s), quantity and configuration of room(s) being used in the booking. For example, if there are two couples (4 adults) in a booking and they want double rooms, then two double rooms must be inserted – the system will not allow four adults in a double room.
FITs also allows rooms to be merged or split on a service-by-service basis within the booking if required. For example, if two couples are in double rooms for the majority of the booking, but at one location sharing a two bedroom apartment, then in the Pax Travelling screen, set up the two double rooms and, during the inserting of the two bedroom apartment service, the two double rooms can be merged into one apartment. Similarly, if one of the couples does not want a particular service, that room can be removed from the service.
Enter pax details
- Create a new booking (see Create an FIT Booking).
- Choose the appropriate room configuration for pax travelling (see Set Room Configurations).
-
On the Create Booking screen, click
 Pax Name Details to add details for passengers in this booking.

-
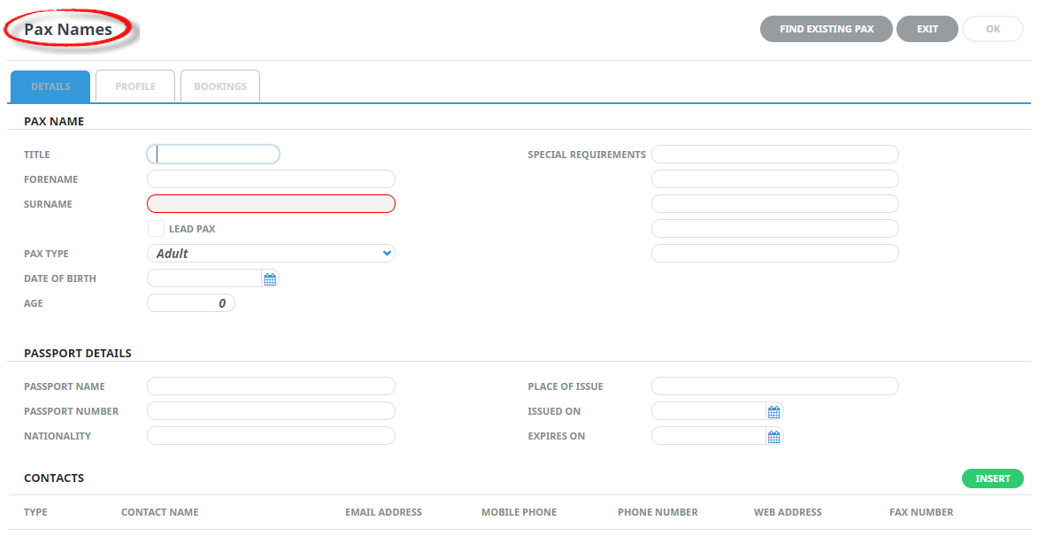
On thePax Names screen, enter data into fields as required and click OK. The examples show pax details for the booking in Create an FIT Booking.
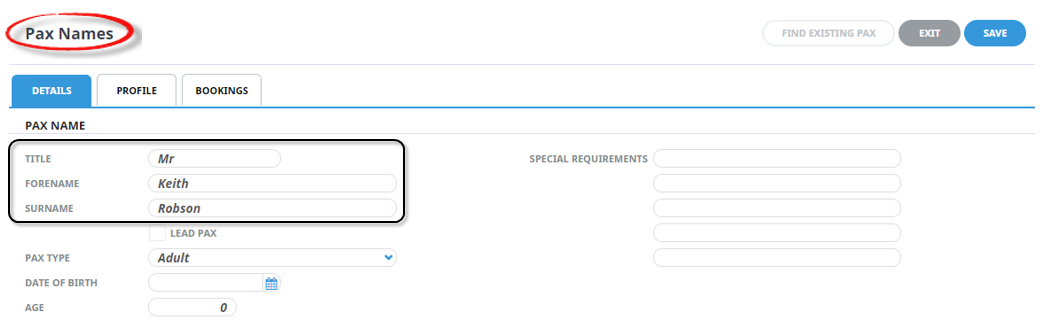
Example: First passenger details
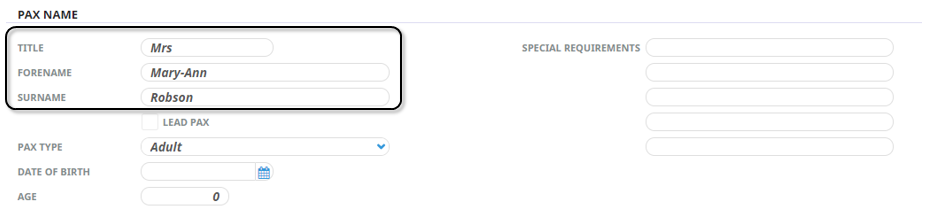
Example: Second passenger details
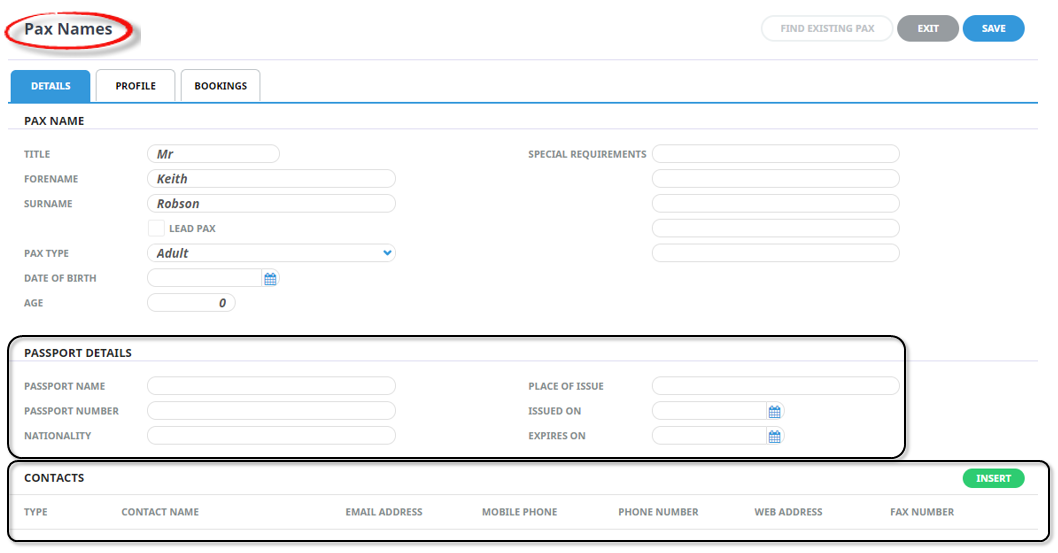
Example: Full Pax Details screen
Passport Details and Contact information can be inserted against each pax name if you have this information.
 When the number of names entered matches the count of pax, after entering the last name, the Create Booking screen re-appears for the booking details to be displayed.
 -
To assign pax to specific rooms clickPax Name Details.
-
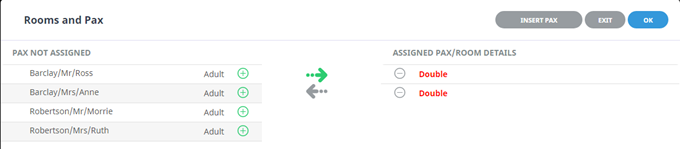
Examine theRooms and Pax screen.
-
Assign pax to rooms:
-
Click the first red room description Double (it will change to blue Double) and assign pax to the room by clicking the green circled + icon.
NOTE: You can assign more than two pax names to (e.g.) a Double room – this allows for a child name to be added to the room. If supplier policies are enabled, the policies will dictate whether the configuration is valid on a service-by-service basis.
-
Click the second red room description Double and assign pax to the second room.
- Continue until all names have been assigned.
-
-
ClickOK to keep the changes and save or update the entry.

-
ClickExit to discard any changes.

- If you clicked OK, continue to Add Services to an FIT Booking.
About the Pax Names Fields
Pax Name (Title 10 char; Forename 60 char; Surname 60 char)
If individual Pax names need to be listed on various Tourplan-generated documents such as vouchers, then enter the names of each passenger within this room, including Title (e.g. Mr.), Forename (e.g. Fred) and Surname (e.g. Smith), plus select Adult, Child or Infant.
Type (Adult, Child, Infant - drop-down; DOB - date; Age - integer)
This drop-down selection is used to assign a type to the individual pax names being entered. The default is Adult.
NOTE:
- If the Product Database has had Age Policies completed, then the date of birth of children and infants can be entered into the ‘Date of Birth’ field. Tourplan will calculate the age(s) of children/infants based on the date of birth v the date of the service in the booking and apply Adult or Child costing automatically, depending on the age of the child/infant at the time.
- If adult dates of birth are being entered, check that the DOB is not a date prior to the Years from/to as defined in Windows Control Panel Regional Settings. By default, Windows interprets 2 digit years as being between 1930 and 2029. If a DOB is entered which is prior to 1939, it is calculated as 100 years later; e.g. 1937 is calculated as 2037.
- It is the ‘Date of Birth’ field which is used to calculate whether children qualify for child rates, not the Age field. An Age can be entered into the Age field, and the Date of Birth field will be calculated, based on the Travel Date being a birthday.
Lead Pax (checkbox, dimmed)
This checkbox becomes active once a pax name is added . The Lead Pax passenger can be designated as the communication contact person for the booking.
Special Requirements (60 char)
These five fields of 60 characters each are available for each passenger (including children) to enter notes that are specific to that passenger.
NOTE: The Special Requirements fields can be labelled by using the FITs INI settings FB_PAXTEXTLABEL1 - 5
Passport Details
These six fields allow passport information to be stored against each passenger (including children). The information inserted here can display on messages and documentation if the message templates use the correct substitution codes.
Passport Details include:
- Passport Name - Full name of passenger as seen in their passport (Char 60)
- Passport Number - Passengers passport number (Char 30)
- Nationality - Nationality of Passenger as seen in their passport (Char 30)
- Place of Issue - Place of passport issue (Char 30)
- Issued On/Expires On - Issue and Expiry date of passport (Calendar selection or format dd/mm/yy the system will amend the manually entered date to dd-mmm-yyyy)
Contacts
These fields are stored for future CRM development, for now contact details can be used and viewed internally.
Inserting client contact information
-
ClickInsert.

-
On theInsert Pax Travelling Contact screen, select contact type from the dropdown.
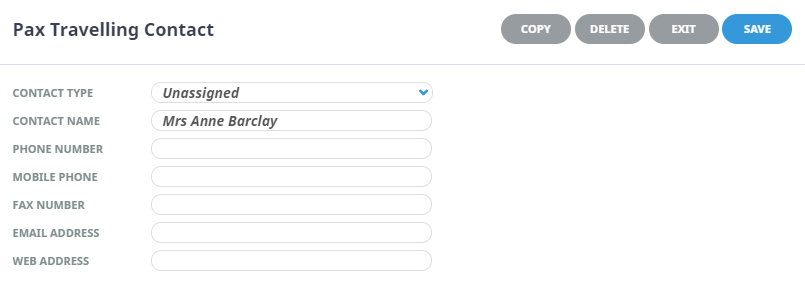
- Enter a Contact Name and relevant contact details required.
- Check the completed screen.
-
ClickSave to keep the changes.

-
ClickExit to discard any changes.
NOTE: The Contact Name field will be cleared and details of the next contact for this passenger can be entered. Phone, fax, email and web details are retained, but can be overridden if necessary.
About Insert Pax Contact Fields
Contact Type (drop-down)
The type of contact.
Examples are: BU-Business HM-Home. These must first be set up in Code Setup > Messaging > Contact Types.
NOTE: Contact Types can be used multiple times in this screen - e.g., there can be more than one contact with a Contact Type of 'BU' (Business), provided the Contact Name is different for each contact.
Contact Name (60 Chr)
The name of the contact.
Phone Number (40 Chr)
The phone number for this contact.
Mobile Phone Number (40 Chr)
The mobile phone number for this contact.
Fax Number (40 Chr)
The fax number for this contact.
Email Address (60 Chr)
The email address for this contact.
Web Address (60 Chr)
The web address for the contact (optional).
Recording Profile Information
Profile information could include Special Diets, Passport Information, noting Membership numbers such as frequent flyer membership, and or specific Analysis Data.
Adding Profile Information per passenger
-
From the Pax Details screen, select theProfile Tab.

-
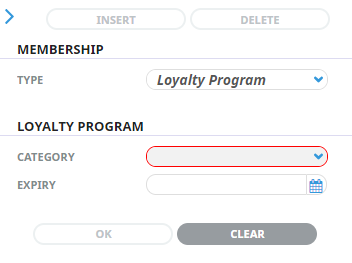
Profile headings will show in a list to the left of the screen. Highlight the Profile tab and clickInsert.
- Select a Profile Type and complete the required fields. This example is for a membership loyalty program.
-
ClickOK to keep the changes and save or update the entry.
Find Existing Pax
Format and type of data being stored will vary depending on the individual user company's requirements and setup.
Finding a passenger name from the CRM
-
From the Pax Details screen, clickFind Existing Pax.

-
The Pax Search screen will open, select the required search filter fields in theSelection Tab.

-
ClickSearch.

- Or use the Results Tab to see searched results.
- Examine the searched Results and click a name.
- The Pax Names screen will re-appear, contiue adding names, or select Exit to review the pax travelling list.