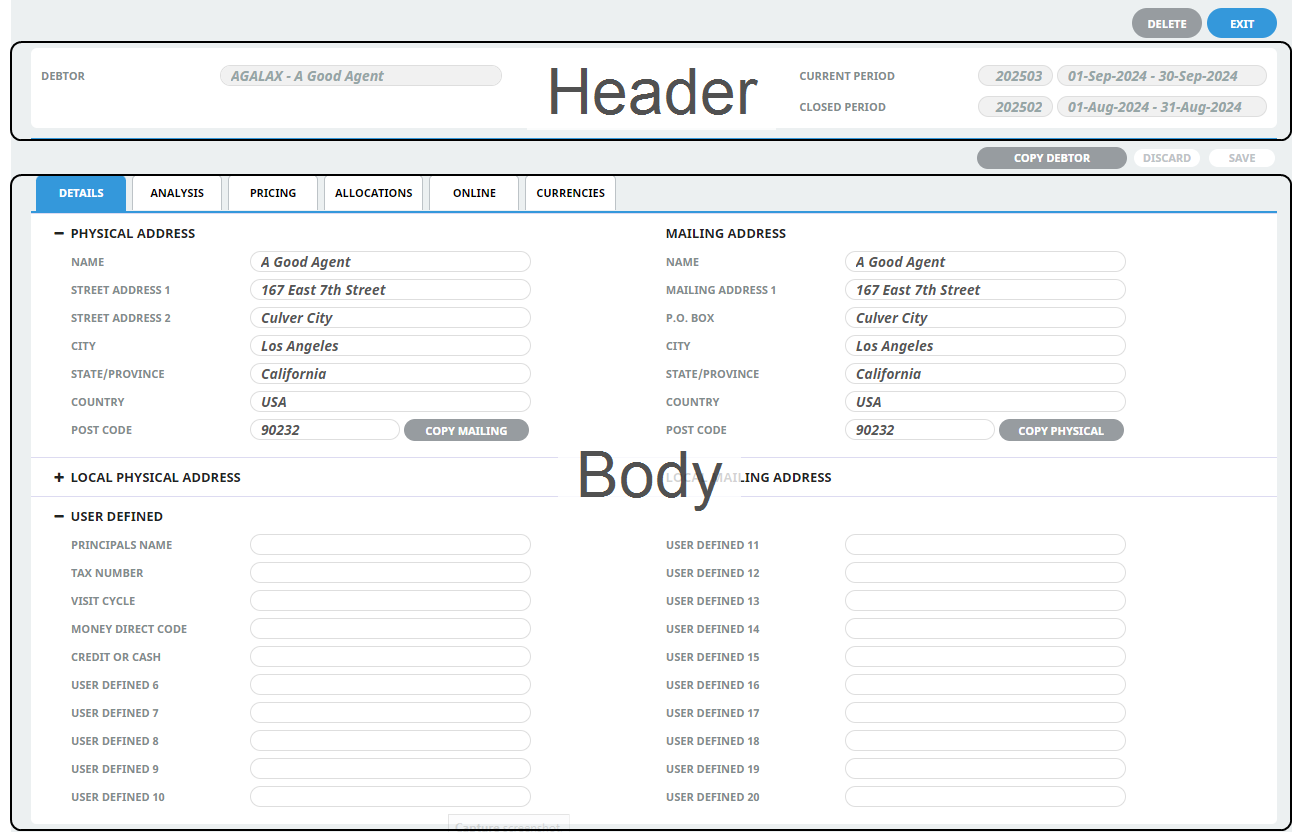
Once a supplier has been created, further agent information is added via the Debtors screen, which is divided into two main sections - a header section and a body section:
- The header section comprises approximately the top quarter of the screen and includes the debtor code and name, dates of the Current and Closed Accounting Periods, and a number of buttons (Delete, Exit, Copy Debtor, Discard and Save).
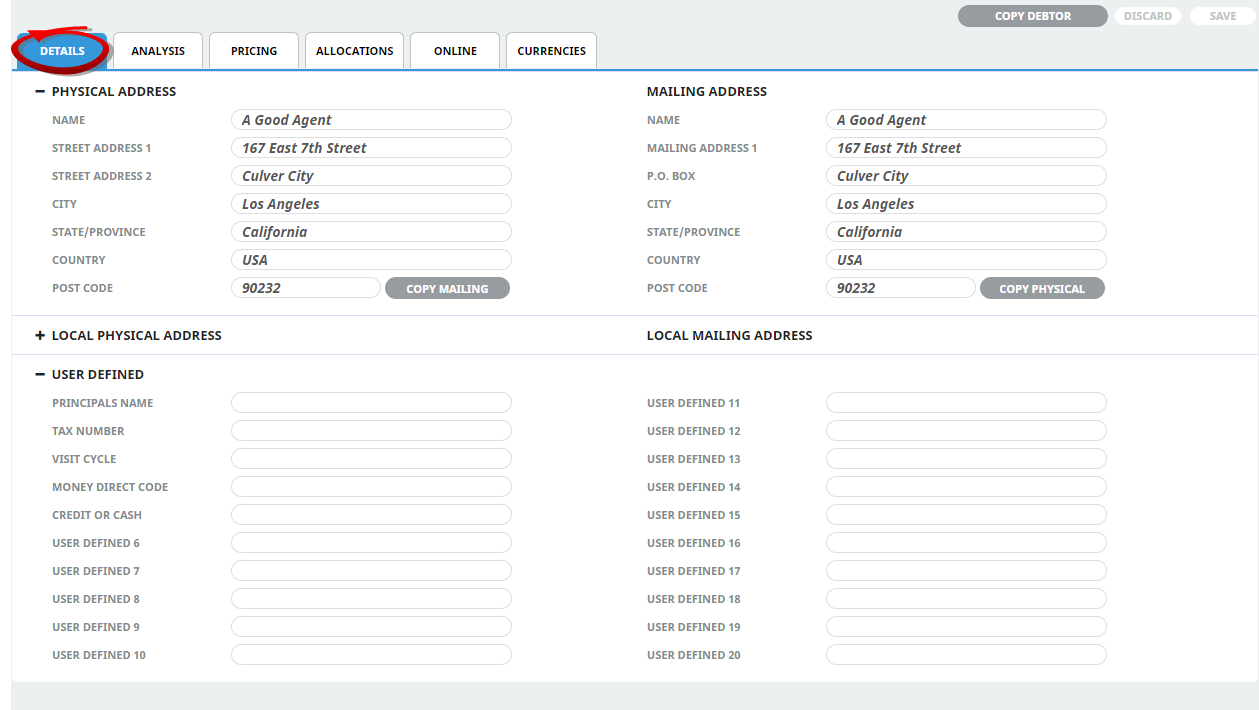
- The body section comprises six tabs (Details, Analysis, Pricing, Allocations, Online, and Currencies) and the Details tab is highlighted by default after creating a new debtor, or when an existing debtor is retrieved.
The Details Tab is divided into three sections - Address Details, Local Address Details and User Defined Details. These are described below.
NOTE: The labels and field data shown in screenshots in this guide provide examples of how agent details might be entered. The following notes also describe fields within the Details Tab, to help with selections and decisions around agent information.
Enter Debtor Details
- If the Debtor to which details are to be added does not exist, create the agent first (see Insert a Debtor / Agent).
- If the Debtor does exist, search for and retrieve it, so that agent details are displayed on the screen (see Retrieve an Existing Debtor).
-
Enter details into the
 Details tab fields.
-
To keep the changes, clickSave.

-
ClickDiscard to discard all changes.

About Details Tab Fields
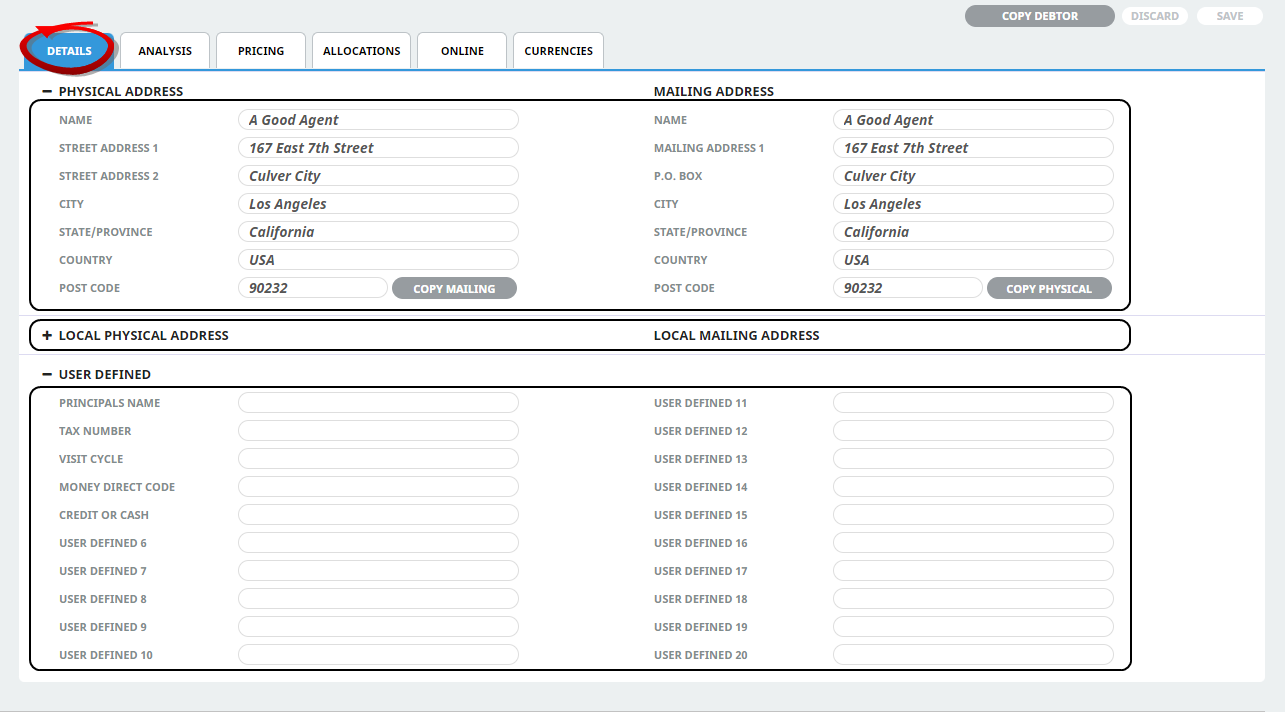
Physical and Mailing Address Details Section
Two sets of Name/Address fields are available; Physical Address and Mailing Address . These can be different. When a new agent is being created, what is entered into the physical address fields is replicated into the mailing address fields, which can be overwritten if necessary.
The 6 labels (Street Address 1 etc.) for both physical and mailing addresses can be user-defined in the (AR) INI Settings. For example, in the screenshot above, what was Mailing Address 2 has been re-labelled as P.O. Box.
The two Copy Buttons (Mailing & Physical) can be used to copy the address details from one section to the other if necessary.
Local Physical and Mailing Address Details Section
On screen insert Local Physical and Mailing address fields are collapsed, expanding this section will display two additional sets of local name and address fields. By default these fields are blank when a new Debtor is first created and should remain blank if alternative address details are not required. These fields provide the ability to use a local address and can be coded to display on messages or online.
NOTE: When installed, the field label for the local physical address simply shows "Address" alongside address field 1 and all other address fields (including all mailing address fields) are blank. The System Setup application can be used to set address labels (menu Home > System > Code Setup > INI Settings > Debtors).
It is imperative that consistency be maintained when entering local address detail; i.e. always use the same line for the Street Address and the same line for Town/City etc. Try not to use commas in supplier name and address fields.
For more information on setting address (and other) labels, refer to the see the System Setup User Manual.
User Defined Details Section
There are 20 user defined text fields that can have labels defined for them via menu Home > System > Code Setup > INI Settings
If field headings have been inserted and the organisation is using these fields, insert the necessary information for this debtor.
These fields can be used as selection data and output in the Excel-based Tourplan Financial Analysis and Operational Reports.