Creating an invoice is described in this user manual via the following procedures:
Insert an Invoice
- Make sure the required debtor / agent is displayed (see Insert a Debtor / Agent or Retrieve an Existing Debtor).
-
From the Debtors menu, select
 Accounting > Transactions.
- Click the Debtors hamburger menu to expand it:

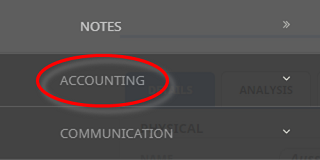
- Click Accounting to expand the Debtors Accounting menu:

- Select Transactions to open the Debtors transactions list screen:

For example, the transactions list screen for AGALAX - A Good Agent: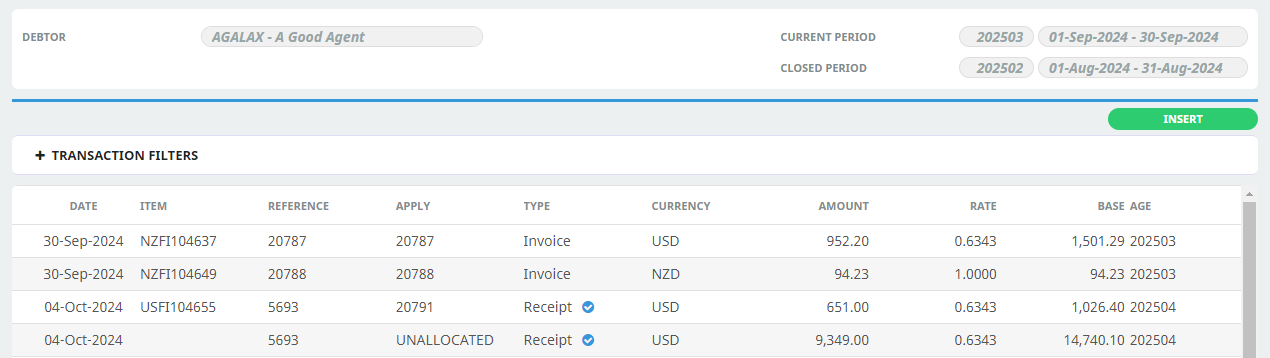
- Click the Debtors hamburger menu to expand it:
-
On the Debtors transactions list screen, clickInsert.

-
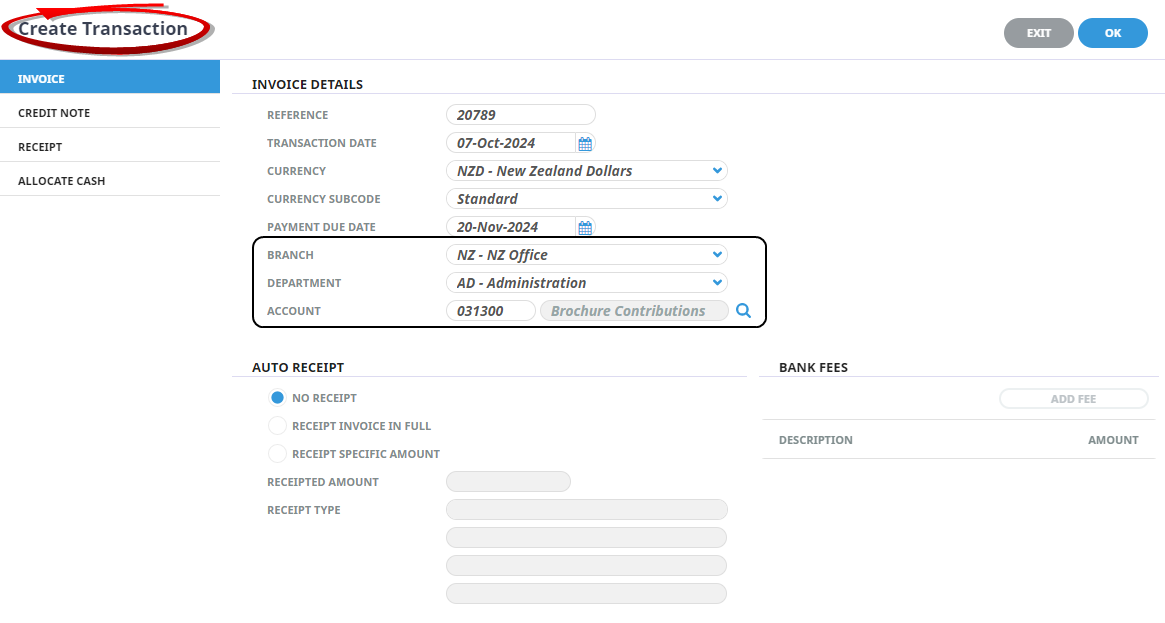
On the
Create Transaction screen, Invoice is the default transaction type. Enter the invoice details accordingly. 
For example, choosing Account NZ AD 031300 NZ - Brochure Contributions and leaving Auto Receipt as the default (No Receipt):
-
ClickOK to keep the changes and save or update the entry.

-
ClickExit to discard any changes.


Clicking OK on the Create Transaction screen automatically opens an Invoice Line screen - continue with creating a debtor's invoice (see Insert an Invoice Line).
About the Create Invoice Transaction Fields
Invoice Details section
Reference
The Invoice Number. This is sequentially allocated from the System INI setting AR_NEXT_INVOICE. This field cannot be overridden unless the Debtors INI setting AR_MANUAL_INVOICE is set to Y, it can be up to 20 characters.
Transaction Date
- This is the date from which the Transaction Period (TRP - as described under Tourplan Accounting Terminology) is determined.
In this example system, the INI setting is System Date, so today’s date is used as the transaction date. The transaction date can be overridden. This could affect the transaction period and the aging of the invoice if the month is changed. The transaction date must be in an open accounting period — the system will not allow a transaction date which is in a closed accounting period.
Currency
The currency that the invoice will be issued in. This can be changed to any of the currencies that are attached to the agent by using the drop-down list. The currency which was checked as the default in the currencies screen during agent set up is the one which displays by default (see Insert a Debtor / Agent).
Currency Sub code
A currency sub code can be displayed or entered here. If a sub code has been entered against the agent, it will be defaulted to this field (currency sub-codes are described in the ).
Payment Due Date
Payment due terms for non bookings invoices are calculated based on the Payment Terms set up in the Debtor against the Currency that the invoice is being generated in. See Debtor Currencies Tab. The date can be overridden if required.
Branch / Department / Account
The GL Account Branch, Department and Account that the revenue from this invoice will be posted to.
Auto Receipt Section
NOTE: Depending on system security settings, these fields could appear during invoice creation allowing a receipt to be created automatically after the invoice has been created. Auto Receipting can be disabled using Security Settings.
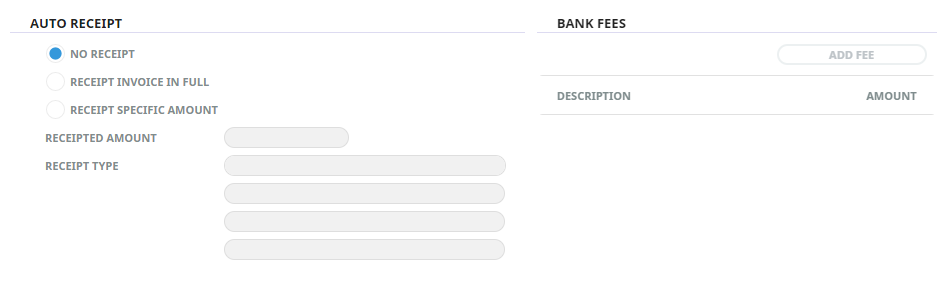
No Receipt
Selecting this radio button will not produce a receipt.
Receipt Invoice Full
Selecting this radio button will require a Receipt Type to be selected.
Receipt Specific Amount
Selecting this radio button will require a Receipted Amount to be entered and a Receipt Type to be selected.
Receipted Amount
This field is live if the Receipt Specific Amount radio button is selected.
Receipt Type
When receipts are entered, a receipt type is applied to the transaction. The receipt type has two uses. It is used to identify the type of payment — e.g., Cheque/Telegraphic Transfer, Credit Card etc. and it also has a General Ledger account attached to it which can re-direct the debit side of the transaction (which is normally the Bank Account), to the account attached to the Receipt Type — e.g., to a Credit Card Clearing account or a Bank Fees expense account etc.
Select the receipt type applicable to the receipt.
User Text 1 – 3
The labels for these three fields are set up when the receipt type is set up. When a receipt type is selected here, the labels (if set up) display. Free format text can be entered into these fields (whether labelled or not).
Bank Fees section
Bank fees/charges can be receipted at the same time as the cash receipt is being issued. Tourplan NX will in that case issue 2 receipts - one for the fees and the other for the banked cash.
Once the Receipt in Full or Specific Amount button has been checked, the  button becomes live. Full details of receipting bank fees is at Issue Cash and Bank Fees Receipts.