A.P. Create Cheques
A.P. Create Cheques allows cheque transactions to be created in bulk against previously entered Supplier/Creditor invoices (as opposed to processing individual cheques in each Creditor). Once the cheque transactions are created, the cheque document can be output using Print Remittances/Cheques/Cheque Remittancesfor printed output and Generate EFT for Electronic Payments.
NOTE: The system does not really care what, if anything is output. It considers that once the cheque create process has been undertaken, then the item is paid. The terminology "cheques" is in fact referring to "payment documents" - which could be cheques, cheques/remittances, remittances only or an EFT file.
NOTE: Before the cheque transaction can be output in any format or style, the appropriate layout template must be available in System > Code Setup > Messaging > Message Definitions.
Create Cheques can be used to produce a list of all supplier invoices due for payment based on payment due date parameters. This list can be saved in Create Cheques and a copy of the selections printed. It can then be used to check that all invoices listed are authorised for payment. The saved list in the Cheque Writer can be edited to have transactions added or removed at any time prior to the cheque transactions being created.
Create Cheques - Invoice Selections - Filter Screen
![]()
Create Cheques
-
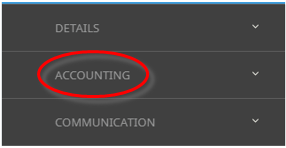
From the Home menu, select
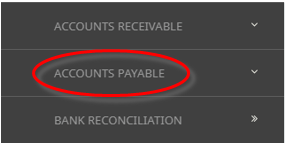
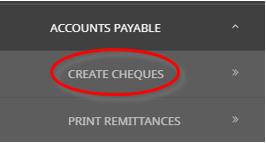
 Financials > Accounting > Accounts Payable > Create Cheques.
- Click the Home Menu to expand it:

- Click the Financials menu option to expand it:

- Click Accounting to go to the Accounting menu to expand it:

- Click Accounts Payable to go to the Accounts Payable menu to expand it:

- Click Create Cheques to go to the Create Cheques screen:

- Click the Home Menu to expand it:
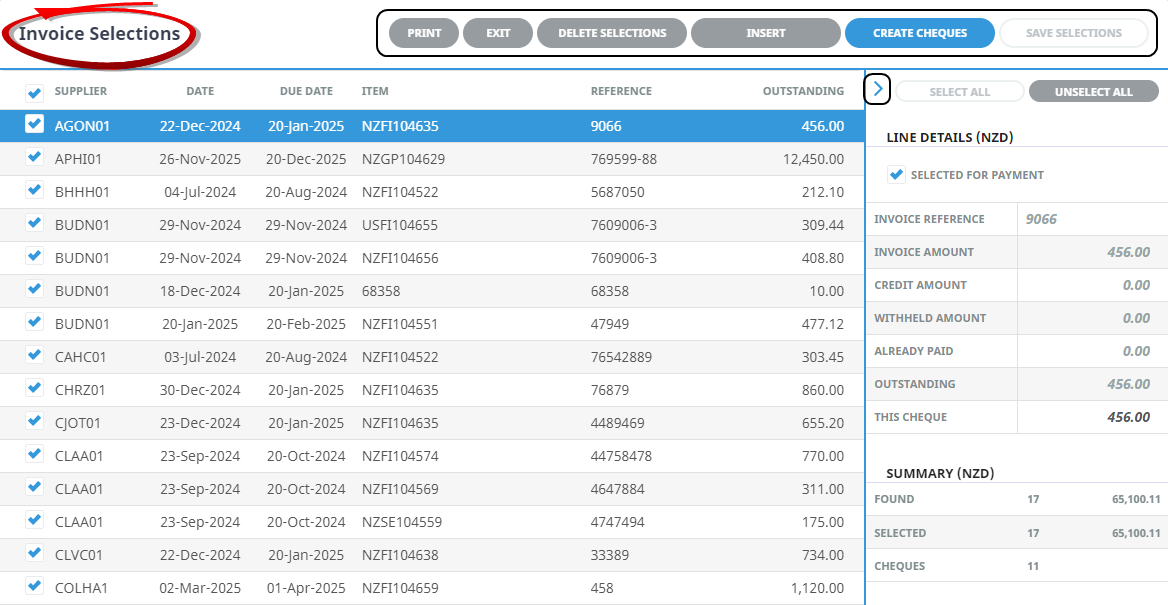
- The Invoice Selections screen will open with the Filter Tab open.
Select the required Currency. NOTE: The transaction currency is a mandatory field.
- On the Invoice Selections Filter Tab, enter the required filters to set the invoice search criteria, selections can be filtered by:
- Payment Due Date From/To
- Include Previously Paid Invoices
- Virtual Credit Cards Active
- Supplier From/To
- Invoice DateFrom/To
- Invoice Reference Contains
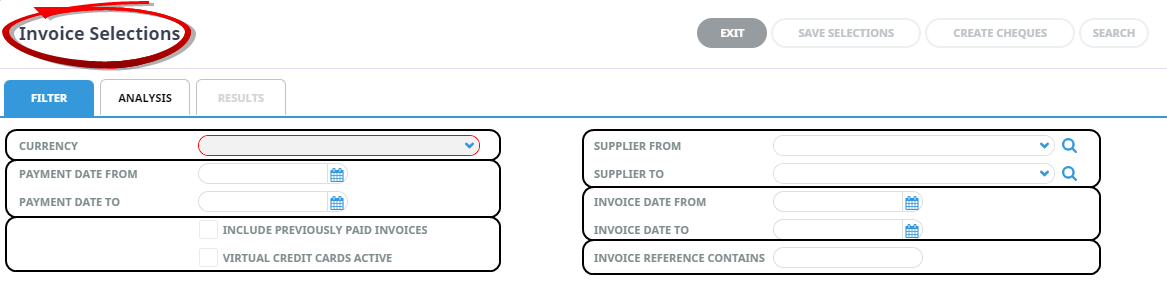
- In the lower section of the Filter Tab, selection is available by all, or specific Booking Branch and/or Booking Department.
NOTE: This is the Branch and Department of the Booking, not the Supplier. The Supplier Branch and Department filters are available on the Analysis Tab.

- Check the completed screen.
-
Select the Analysis Tab, and, if required, filter by the Supplier Branch, the Supplier Department and the 6 Analysis Codes attached to the Supplier.
NOTE: When the Analysis Tab is accessed, the available selections are in collapsed mode. Click the
 to expand the selections and the
  to expand a drop-down.For example:
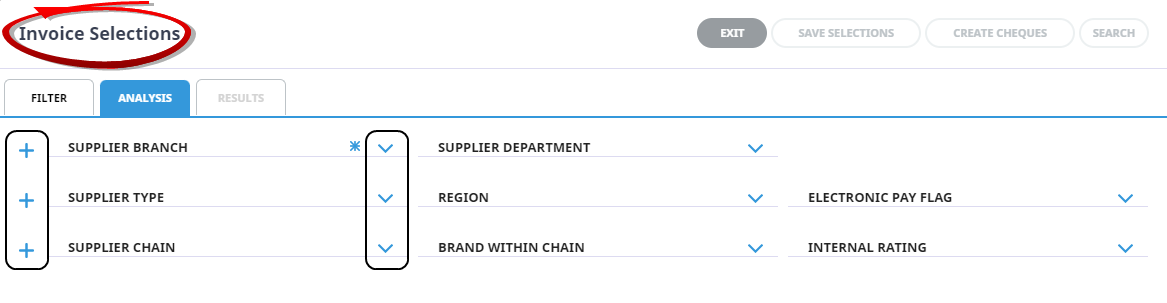
NOTE: When a selection has been made with an Analysis Code, and the selections are collapsed, an * appears next to the Analysis Code name.
-
When selections have been completed, clickSearch, to display results.

-
Or select theResults Tab, all invoice transactions that meet the search criteria will display under the Results Tab.
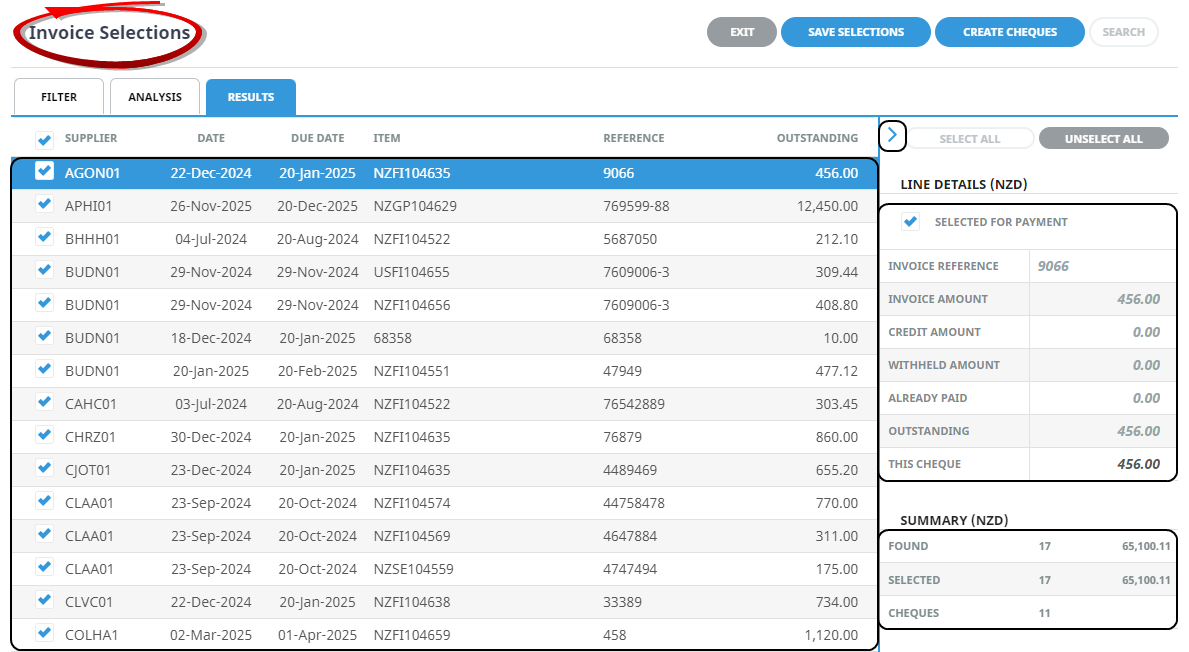
NOTE: The
 to the left of the Select All/Unselect All can be used to hide the side panel. When the side panel is hidden, the Right Arrow is replaced by a Left Arrow
  which can be used to reveal the panel.
-
-
ClickSelect All to select all invoices.

-
Or, Select the invoice(s) to include in the cheque by clicking the requiredcheck-box(es).

-
- Check the Completed Screen.
-
ClickSave Selections to save the selections.

-
Or, ClickCreate Cheques to create the cheque(s).


About Creditor Invoice Filter Screen
![]()
Currency
The currency that the Cheque will be issued in.
Cheques can only be issued in the same currency that the creditors invoice has been entered into the system in - i.e., a USD cheque can not be applied to a NZD Invoice.
Payment Date From/To
The Payment Due From/To dates that are to be included in the selection process.
Include Previously Paid Invoices
Checking this box will list all invoices which have been previously fully paid for the selected suppliers.
Virtual Credit Cards Active
Checking this box will list all invoices for suppliers that are nominated to be paid by virtual credit card (VCC).
Supplier From/To
Selection of Suppliers can be used to filter the results of invoices for inclusion in the cheque run.
Invoice Date From /To
Results can be filtered based on a range of Invoice (Transaction) Dates.
Invoice Reference Contains
Results can be filtered based on invoice references matching any combination of consecutive characters entered into this field, regardless of where in the invoice reference the string occurs.
Selection Results Screen
NOTE: The ![]() to the left of the Select All/Unselect All can be used to hide the side panel. When the side panel is hidden, the Right Arrow is replaced by a Left Arrow
to the left of the Select All/Unselect All can be used to hide the side panel. When the side panel is hidden, the Right Arrow is replaced by a Left Arrow ![]() which can be used to reveal the panel.
which can be used to reveal the panel.
At the top of the screen, the two buttons Save Selections and Create Cheques become active once selections have been made.
The screen is in three sections.
- Creditor invoices that meet the search criteria display in the left of the screen and show the Supplier Code, Invoice Date, Payment Due Date, Item (the Booking Reference for bookings related transactions), invoice Reference, and total amount Outstanding on the invoice.
- The Line Details section on the right of the screen shows the values of the currently highlighted invoice line.
- The Summary section shows the total number of invoices found, their total value and the number that have been checked for processing and their total value.
The Select All/Unselect All Buttons above the Line Details section can be used to Select/Unselect all transactions.
About Save Selections
An alternative selection can be made instead of creating the cheque. Use the Save Selections Button to save the selections and return to create the cheques at a later date.
NOTE: The ![]() to the left of the Select All/Unselect All can be used to hide the side panel. When the side panel is hidden, the Right Arrow is replaced by a Left Arrow
to the left of the Select All/Unselect All can be used to hide the side panel. When the side panel is hidden, the Right Arrow is replaced by a Left Arrow ![]() which can be used to reveal the panel.
which can be used to reveal the panel.
About Save Selection Buttons
Selections are able to be saved and more selections made (and saved) if the process needs to be done in multiple stages. This can be for example, if selections are required to be made for different Booking branches or departments, or selections not completed etc.
NOTE: Selections do not have to be saved if cheques are to be created immediately.
When Save Selections is clicked, the checked selections remain displayed, along with the Line details and Summary Sections.
The Invoice Selections screens re-displays with the Save Selections button disabled. There are 5 active buttons across the top of the screen.
- Print.


Clicking the Print Button will open a print dialogue to output the Saved Cheque Selections Report. There are options to Download the report as a PDF file, view the report on-screen, or Exit the print dialogue.
Consolidate Transactions
Checking the Consolidate Transactions check-box will consolidate into a one line total all of the transactions for suppliers that have multiple invoice lines selected.
- Exit.

Clicking the Exit button will exit Create Cheques to the Current Filter screen where all Saved Selections are visible per user.
NOTE: When there are saved selections in the name of the user who accesses Create Cheques, the Current Filter screen will display before the Invoice Selections Screen will display.

- To keep the current saved selections and create new selections, click the New Selection button.

- This will open the Invoice Selections Screen.
- To keep the current saved selections and create new selections, click the New Selection button.
- Delete Selections.

Clicking this button will delete the current saved selections list.
- Insert.

Clicking this button will allow additional selections to be made, based on different filter criteria, except the currency which must remain the same as the saved selections.
- Create Cheques.
Clicking this button will open the Create Cheques Dialogue. This is the same dialogue that displays if selections are not saved and cheques are created directly from the Invoice Selections Results Tab.
About Create Cheques Fields
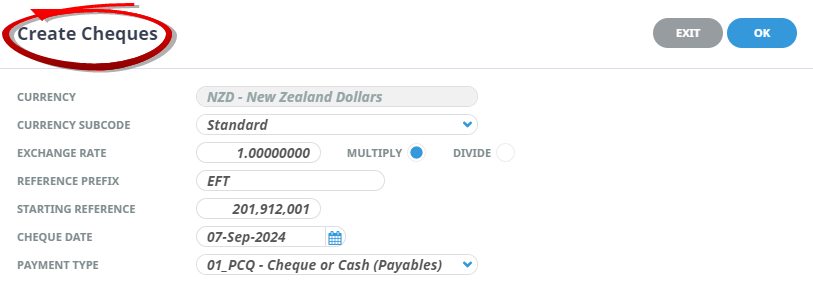
Currency (Display Only)
This field displays the currency that was originally selected on the Invoice Selections Filter Tab and it can not be changed here.
Currency Sub-code
If a non-base (i.e., foreign) currency is being paid and currency sub codes are being used, select the appropriate sub code.
Exchange Rate
When the currency and sub code have been selected, this field will default to the current day’s exchange rate (as set up in the Tourplan NX currency exchange rates table). This value may be edited here for this cheque creation session only.
Multiply/Divide
If the exchange rate is edited, the Multiply/Divide radio buttons can be set to apply to the new rate.
Reference Prefix
A prefix can be entered which prepends the cheque reference as each cheque transaction is created. This is mandatory and it can be helpful where multiple Create Cheque sessions are being done—e.g., by branch, or trade creditors vs overhead creditors, or where one payment run is on printed cheques and another with EFT.
Starting Reference
This is the starting reference that Tourplan will use when creating the cheque transactions. It may or may not be an actual cheque number—it may well be a reference for a run of electronic payment transactions.
Cheque Date
This date determines both the transaction period and the period in which the General Ledger bank account will be updated.
Payment Type
Payment types are used to direct the bank leg of cash transactions to the correct G.L. Bank Account. In Creditors, a cheque transaction will debit the creditors control account and credit the bank account.
About Cheque Summary Screen
An on-screen Cheque Summary report displays when the cheques have been created. Once the cheques have been created, the Saved Selections are deleted.
NOTE: Cheques can now be printed using Print Remittances/Cheques/Cheque Remittances or if the Create Cheques process was for EFT Payments, the EFT file can be created using Generate EFT.