Invoices are generated in the system on a service line-by-service line basis. This has two main benefits:
- It enables accurate statistical reporting to be obtained showing which agents are selling which product and what margins by agent are being obtained; and
- It identifies which services have been invoiced. This can be useful when an agent has to be invoiced for a specific service where (e.g.) a deposit has to be paid to the supplier.
NOTE: Because the invoice details are generated internally on a line-by-line basis does not mean that is how they will physically print. Print format is determined by the invoice message template set up.
When the Invoice Details tab is selected, an invoice can be raised for:
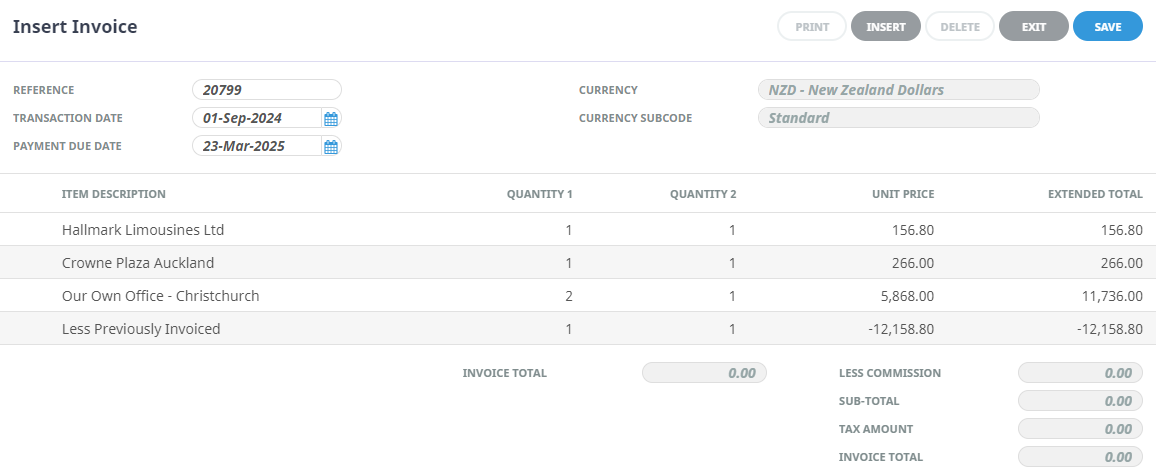
- The total outstanding value of the booking. If previous invoices have been raised, the new invoice will be for the total booking value with an additional "Less Previously Invoiced" line subtracting the value already invoiced.
- A Deposit Invoice, based on a percentage or amount and for specific service(s) if required.
- If Auto Receipting has been enabled, a Receipt can be automatically created after the invoice has been generated.
There are three invoicing procedures described in this topic:
- Create an Invoice (Tab 1 - Invoice)
- Create an Invoice (Tab 2 - Deposit Invoice)
- Create an Invoice (Tab 3 - Auto Receipt)
Create an Invoice (Tab 1 - Invoice)
- Search for and retrieve a booking to work with. If this hasn't been done already, see Retrieve an Existing Quote/Booking.
-
Select menu
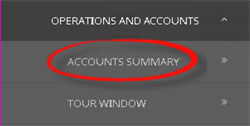
 FITs > Operations and Accounts > Accounts Summary.
- Click the FITs hamburger menu to open it:

- Click the Operations and Accounts menu option to expand it:

- Click Accounts Summary to show booking totals and a list of transactions, and to generate invoices:

- Click the FITs hamburger menu to open it:
-
If there are any transactions in the list, provided they are in an open accounting period, they can be edited by clicking thetransaction.
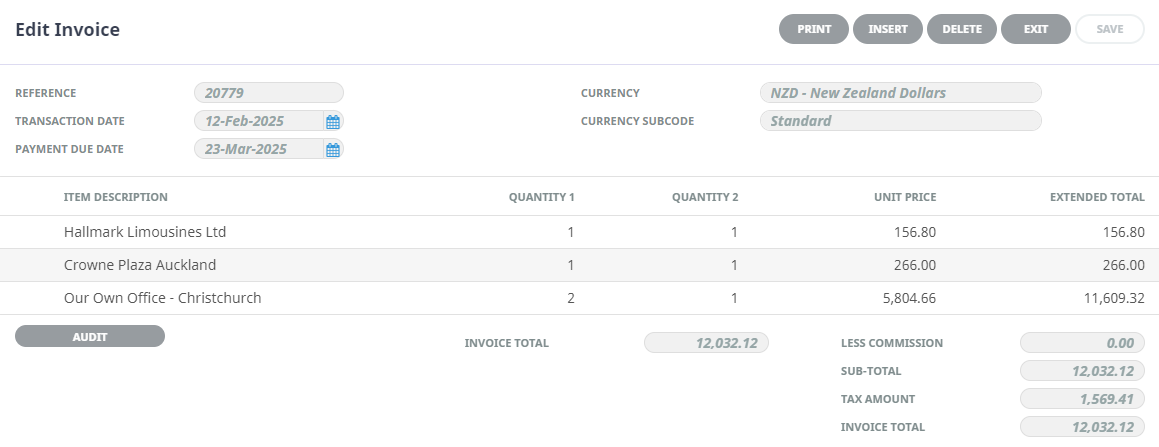
NOTE: To change anything on the Edit Invoice screen, click one of the Item Description lines to display the Invoice Line screen, and make your changes there.
-
To create a new invoice, clickInvoice.

-
On the Insert Invoice screen (Invoice tab), click OK to view the invoice detail.

-
On the detailedInsert Invoice screen:

-
If there are no further entries required for this invoice, check that all values are correct and clickSave to output the invoice transaction.

-
To edit a line, double-click it.
NOTE: It is possible to use the
Insert button to insert a new invoice line, however this is more likely to be used when a "manual" type of invoice is being issued.
-
On theInvoice Line screen, edit fields if necessary and click OK.
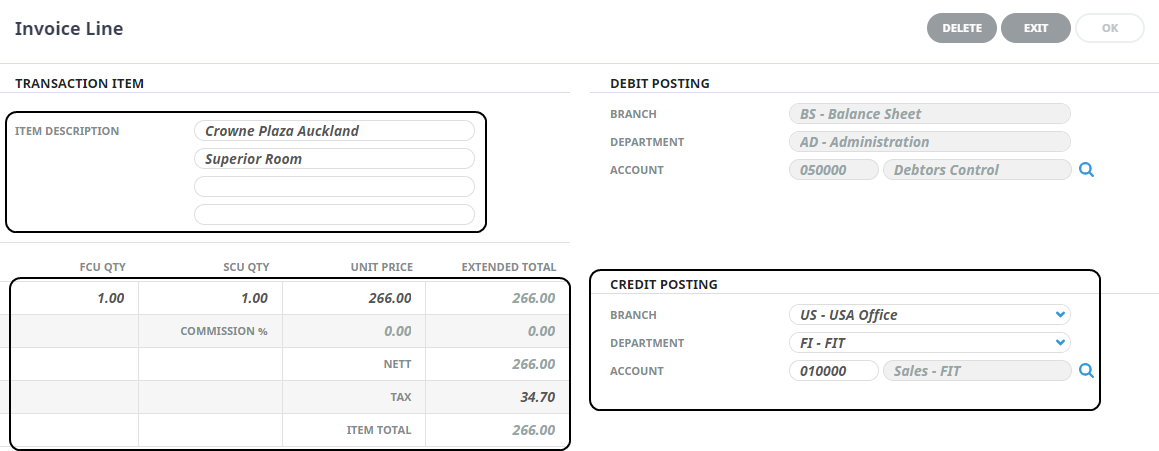
NOTE: Debit and Credit positing are automated and should not be changed.
- Click Save to output the invoice transaction.
-
-
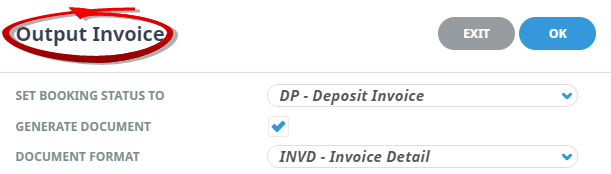
On the Output Invoice screen
- Select an appropriate booking status from the drop-down field Set Booking Status To and click OK.
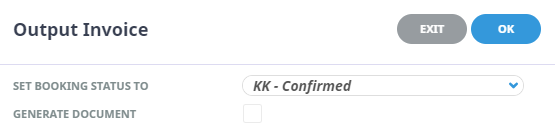
- To email or generate a document, selectGenerate Document and an appropriate Document Format from the drop-down field and click OK.
-
If the Review & Send Document screen appears, there are several options available - choose one:
- Click Exit to return to Accounts Summary. The invoice now appears in the Transactions list.
- Click Download to save a local copy of the invoice document as a PDF file.
- Email the invoice document by selecting the Sent Details tab, entering email address information and clicking Email.


Create an Invoice (Tab 2 - Deposit Invoice)
- Search for and retrieve a booking to work with. If this hasn't been done already, see Retrieve an Existing Quote/Booking.
-
Select menuFITs > Operations and Accounts > Accounts Summary.
- Click the FITs hamburger menu to open it:
- Click the Operations and Accounts menu option to expand it:
- Click Accounts Summary to show booking totals and a list of transactions, and to generate invoices:
- Click the FITs hamburger menu to open it:
-
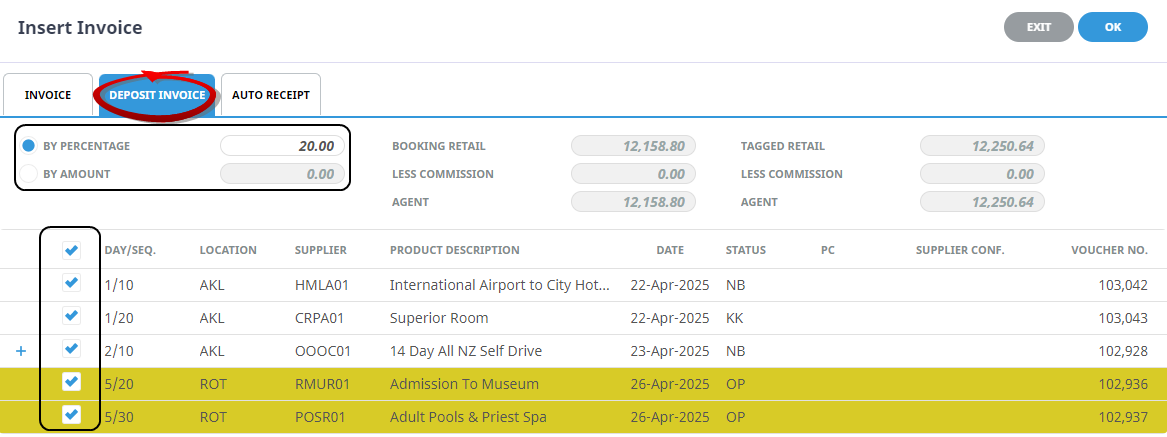
On the Insert Invoice screen, complete the transaction header details, then click theDeposit Invoice tab to view the invoice detail. Select how the Deposit Invoice is to be generated (by percentage or by amount), and enter the value. Tag the services the invoice is to apply the deposit amount for and click Ok.
-
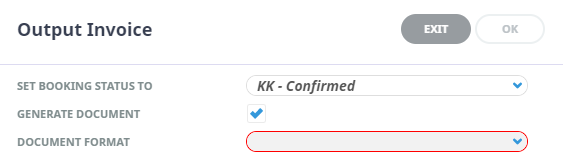
On theOutput Invoice screen, select an appropriate booking status from the drop-down field Set Booking Status To, choose whether or not to generate a document (including specifying the document format) and click OK.
-
If the Review & Send Document screen appears, there are several options available - choose one:
- Click Exit to return to Accounts Summary. The invoice now appears in the Transactions list.
- Click Download to save a local copy of the invoice document as a PDF file.
- Email the invoice document by selecting the Sent Details tab, entering email address information and clicking Email.
Create an Invoice (Tab 3 - Auto Receipt)
- Search for and retrieve a booking to work with. If this hasn't been done already, see Retrieve an Existing Quote/Booking.
- Switch to the Accounts Summary view of the booking (see Accounts Summary).
-
On the Insert Invoice screen, complete the transaction header details, and then click theAuto Receipt tab.
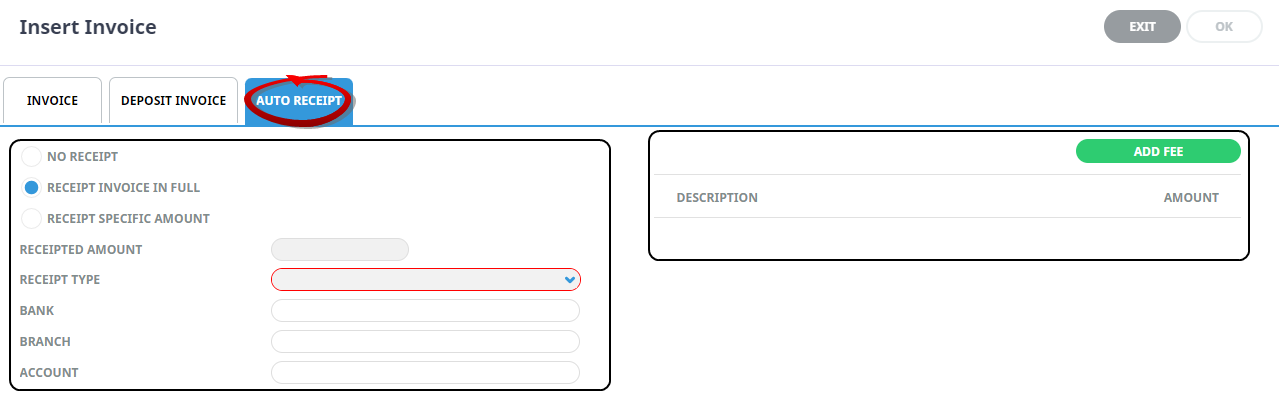
NOTE: If an Auto Receipt invoice is being generated, the invoice creation does not begin until the receipt header details have been completed and the OK button clicked.
-
On the detailedInsert Invoice screen:
-
If there are no further entries required for this invoice, check that all values are correct and clickSave to output the invoice transaction.
-
To edit a line, double-click it.
NOTE: It is possible to use the
Insert button to insert a new invoice line, however this is more likely to be used when a "manual" type of invoice is being issued.
-
On theInvoice Line screen, edit fields if necessary and click OK.
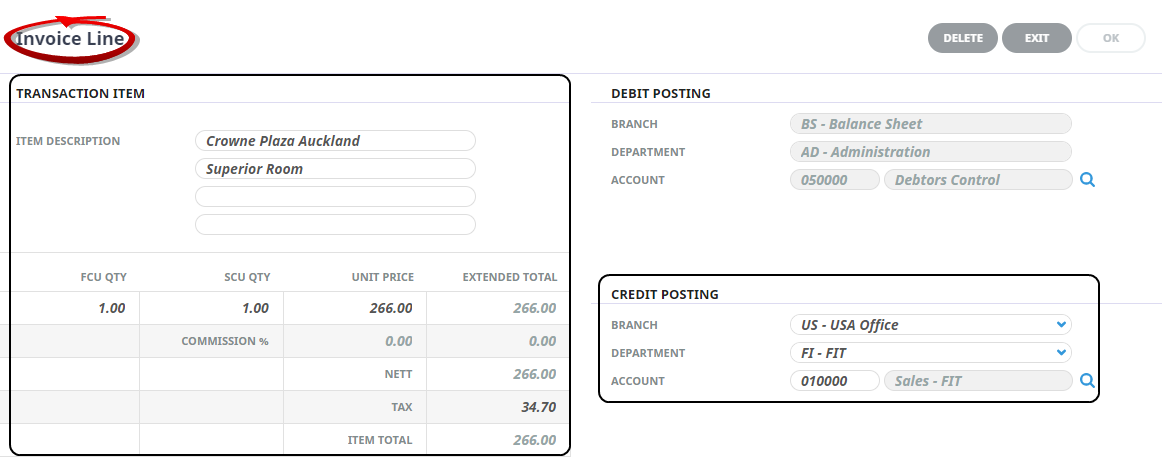
NOTE: The Credit Posting section will have the General Ledger account in it that the credit side of the transaction will be posted to. This will be the default Revenue Account as set up in the General Ledger INI settings. This account detail should not be altered - if the incorrect account is chosen, cross ledger postings could result which will cause difficulty in reconciling.
- Click Save to output the invoice transaction.
-
- On the Output Invoice screen, select an appropriate booking status from the drop-down field Set Booking Status To, choose whether or not to generate a document (including specifying the document format) and click OK.
-
If the Review & Send Document screen appears, there are several options available - choose one:
- Click Exit to return to Accounts Summary. The invoice now appears in the Transactions list.
- Click Download to save a local copy of the invoice document as a PDF file.
- Email the invoice document by selecting the Sent Details tab, entering email address information and clicking Email.
About the Insert Invoice Fields
Insert Invoice Screen (Tab 1 - Invoice)
When OK is clicked on the Invoice tab, Tourplan raises an invoice for either the total value of the booking or, if previous invoices have been raised, the difference between the amount already invoiced and the booking value.
Agent
Accept the Agent defaulted from the Booking Header. If necessary, an invoice can be issued to a different agent by selecting the agent from the drop-down list.
NOTE: It is possible to issue multiple invoices for a booking to different agents/clients by changing the agent code in this field.
Reference
This invoice number is automatically generated by Tourplan. A system setting will normally dictate that the invoice number cannot be changed.
Transaction Date
This is the Transaction Date and determines the Transaction Period. The default date here will depend on an accounting INI setting. The default transaction date could be either today’s date, the booking travel date, the date of the last service in the booking or a date based on the current accounting period. The default date can be overridden if a different date is required on the invoice. The transaction date cannot be in a closed accounting period.
Currency
The invoice currency defaulted from the booking Header. This may be changed for the invoice if required. Only currencies that are attached to the agent are available. (Also see 'Invoice By Sell Currency' in the table below.)
Currency Subcode
This will default to the currency sub code from the booking header. (See discussion under Agent Currencies, Booking Currencies, Service Currencies & Invoice Currency.)
Payment Due Date
Defaulted from the standard payment terms set up for this Agent. This may be overridden. In this example the payment due terms are 60 days prior to travel.
Branch, Department & Account
Unless instructed otherwise, these should be left blank as these values are automatically set based on the booking reference branch & department values.
Generate Invoice Lines
Create individual lines for each invoice inserted (the default option).
Consolidate Linked PCMs
If the Booking has Linked PCMs in it, this checkbox will become active. Checking this box will show the total of a linked PCM as one invoice line as opposed to a line for each service in the PCM.
Invoice By Sell Currency
In addition to being able to invoice in any currency that is attached to the agent, ticking this checkbox will invoice only those services whose sell currency matches the currency selected from the currency drop-down above. If (e.g.) there are services in the booking whose sell currency is USD and the booking currency is NZD, then selecting USD from the currency drop-down and ticking this checkbox will only invoice those services with USD as the sell currency.
Insert Invoice Screen (Tab 2 - Deposit Invoice)
When the Deposit Invoice tab is selected, a deposit invoice can be generated using either a percentage amount or a value amount. In both cases, the amounts will be pro-rated across the services that are tagged in the Deposit Invoice screen. Those services that have a status that excludes the costs from the total (e.g., Optional services) will not be included in the invoice calculation.
Insert Invoice Screen (Tab 3 - Auto Receipt)
Some user companies have a need to receipt an invoice as soon as it is issued – an example being when payment by credit card is being processed when the invoice is raised.
NOTE: Standard receipting cannot be done here - that has to be done in the Debtors application.
Receipt Invoice In Full
When this radio button is selected, the full amount of the invoice about to be generated will be receipted
Receipt Specific Amount
Selecting this radio button will allow a specific amount to be entered into the Receipted Amount field. This amount will be prorated across all invoice lines.
Receipt Type
Select the required Receipt Type from the dropdown. The receipt type determines which system bank account the receipt will be credited to.
Receipt Text 1 - 3
There are three user defined text fields against each Receipt Type. These can have labels set up for them when the receipt type is defined. The labels will display here once a receipt type is selected. Common use of receipt type text are labels for "Bank", "Branch" and "Account" or "Card Type", "Card Number", "Card Expiry".
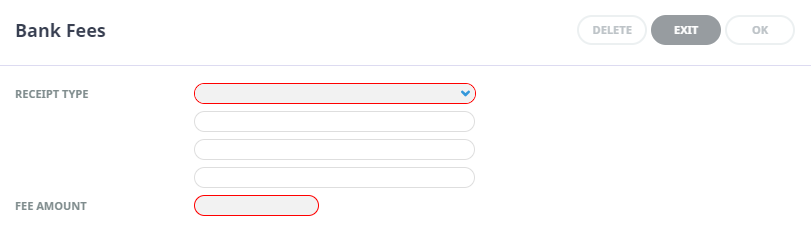
Add Fee Button
If there is a bank charge associated with the receipt - e.g., foreign exchange transaction fee - clicking this button will allow selection of an additional Receipt Type to allow the fee to be posted to the correct expense account.