This is the third of six tasks described in this user manual for changing
NOTE: The numbering is simply for reference - there is no particular order in which tasks need to be completed and, depending on the PCM, they might not all be needed.
The full list is:
There are PCM Notes and Agent Notes:
- PCM Notes allows free-format notes to be added to the PCM under a range of predefined Note Categories, which must first have been set up via Home > System > Code Setup > Messaging > Notes. Notes can be output on documents and messages to both agents and suppliers if the note category is set to 'Include in Messaging'.
- Booking Notes will sort data by note category.
- Agent Notes allows viewing (read-only) of notes attached to the agent.
NOTE: Notes added in this screen apply at the PCM Header level; i.e. to the whole PCM rather than to a specific PCM service line.
Insert/Modify a Booking Note
- If you haven't already done so, search for and retrieve a PCM to work with (see Retrieve an Existing PCM).
-
The default view for a PCM is the
 Dashboard View.
-
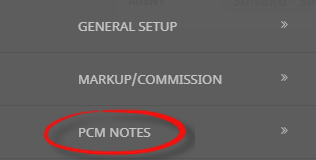
To examine and work with PCM Notes, from the PCM Quotes menu, selectPCM Quotes > PCM Details > PCM Notes.
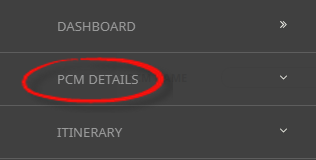
- Click the PCM Quotes hamburger menu to open it:

- Click the PCM Details menu option to expand it:

- Click PCM Notes to open the PCM:

- Click the PCM Quotes hamburger menu to open it:
-
From the list ofPCM Notes returned, click any existing note to open it. To add a note, click Insert.

-
On thePCM Notes screen, choose a category type from the Category Type drop-down list.

-
Enter text in the body of thePCM Note and format as required.

-
ClickSave to keep the changes.

-
ClickExit to discard any changes.


NOTE: If you are using multi language note categories, a further field selection to assign a language occurs. This allows language alternative text to be inserted within a booking note and if message templates are configured to use multi language notes then the note information will be generated using the appropriate alternative language.
About PCM Notes Formatting Fields
The rich text editor section (or body) of the note is a blank page for the
The Editing screen has the following items:

| Format type | Format Option Descriptions |
|---|---|
| Format | Format of the paragraph text. Normal, Headings 1,2,3,4,5, & 6, Formatted, Address, |
| Font | Font of text (will default from the INI Setting DEFAULTFONT) |
| Size | Font Size of text (will default from the INI Setting DEFAULTEDITFONTSIZE) |
| Style, Font and Font Size. The available styles and fonts are the Windows styles and fonts installed on the computer running Tourplan | |
|
|
Bold - highlight the text to be bold faced and click this button |
|
|
Italics - highlight the text to be italic and click this button |
|
|
Underline - highlight the text to underlined and click this button |
|
|
Colour of text – highlight the text to change the colour and click this button |
|
|
Numbered bullet points - click this button to create a numbered list |
|
|
Bullet points - click this button to create a bulleted list |
|
|
Left aligned text - click this button to justify text on the left margin |
|
|
Centre aligned text - click this button to centre text between the left and right margins |
|
|
Right aligned text - click this button to justify text on the right margin |
|
|
Left and Right justified text. Click this button to justify text between the left & right margins |
|
|
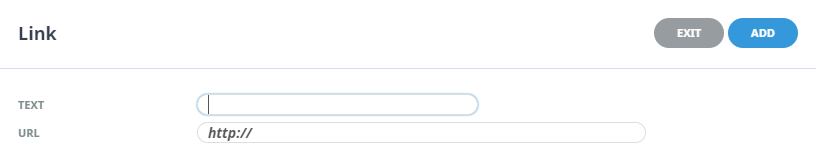
Insert a URL link – click this button to insert the text you want showing as a hyperlink and insert the required URL
|
|
|
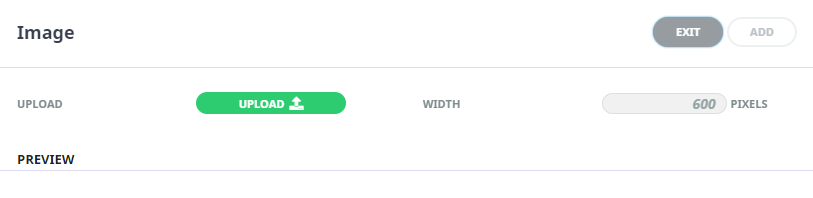
Upload an image – click this button to upload an image
|
|
|
Insert a table – click this button to insert a table |
|
|
Cut text (Ctrl+X) highlight text to be cut and click this button |
|
|
Copy text (Ctrl+C) highlight text to be copied and click this button |
|
|
Paste text (Ctrl+V) place the cursor at the point where copied/cut text is to be placed and click this button |
|
|
Selecting this button will show the text editor in CSS styling source code |