Supplier currencies are specific to the supplier and include financial details related to currency, such as:
Default Currency, Buy Currencies, Taxes, Default Expense Account, Payment Terms, Deposit Terms, Bank Account details.
Supplier currencies are added and maintained via the Currencies Tab.
Enter Currency Details
-
If the supplier to which details are to be added does not exist, create the supplier first (see Create a Supplier).
-
If the supplier does exist, search for and retrieve it, so that creditor details are displayed on the screen (see Searching for Products or Suppliers).
-
Click the
 Currencies tab.

-
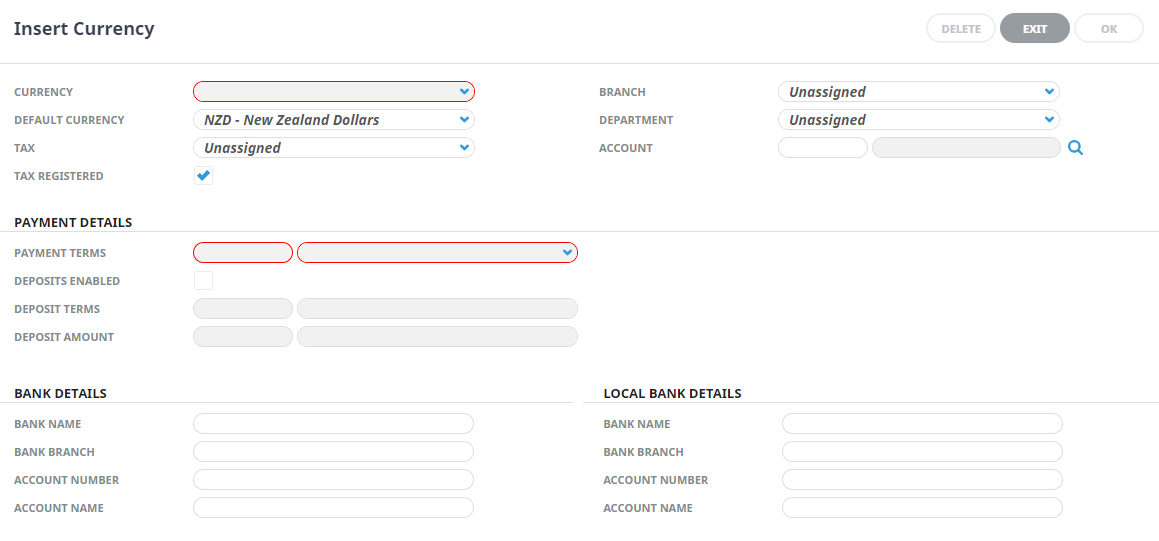
On theInsert Currency screen, enter details into fields as required.
-
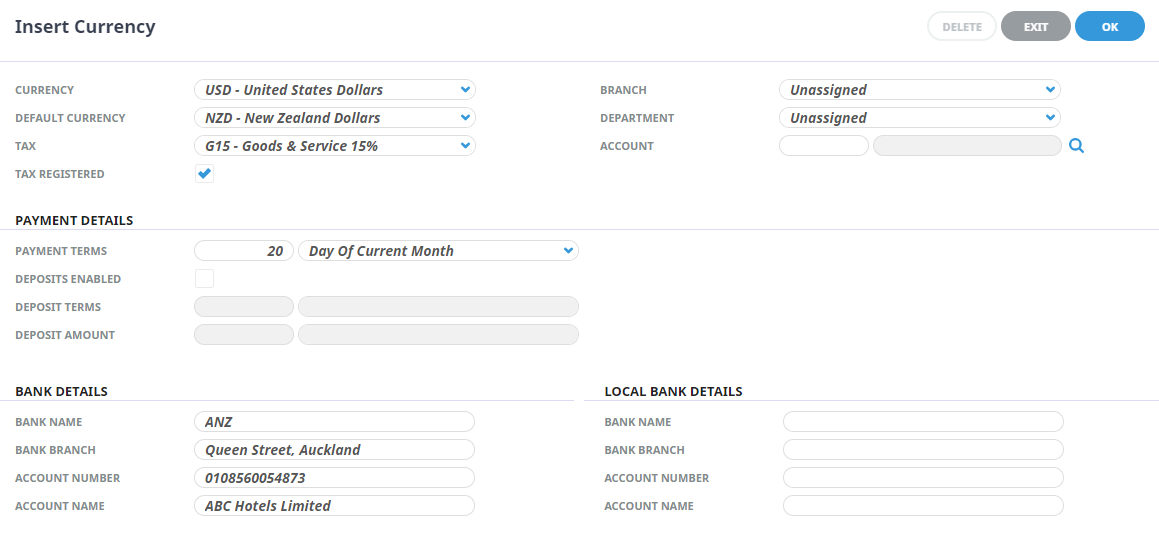
Check thecompleted screen.
-
ClickOK to keep the changes and save or update the entry.

About Currency Tab Fields
Currency
Available currencies display in the drop-down list. A currency can be added to the supplier individually by selecting it.
Do not add currencies that are not likely to be used by the supplier. This will only make reconciliation at the end of each accounting period more time consuming. Only attach currency(s) in which the supplier will be paid.
When a currency is selected, other Currency Settings fields become live and can be completed.
Default Currency
A Default Currency would have been selected when first creating the Creditor however the field can be changed. To amend choose the currency that is going to be used most of the time for this supplier. This becomes the default and it can be overridden at transaction entry time. This currency will be used by default when entering rates for products setup for this supplier.
Tax
Available taxes that have already been setup in the Code Setup application are available from the drop-down list. To attach a tax, select it. This tax will be used by default when entering rates for products setup for this supplier.
Any tax that is attached in this field is only used when Non-Booking transactions are entered against the supplier. This tax is not used when calculating the taxes in a booking. Booking taxes are calculated on a service-by-service basis (allowing for service components that could be non-taxable) and the tax on markup and commission is calculated based on the Tax Indicator attached to the booking or booking agent.
Tax Registered
This flag determines whether the supplier is registered for tax purposes.
This setting is only required where Input/Output type taxes (GST/VAT) are used.
Branch / Department / Account
These three fields can be used to attach a GL expense account that all expenses generated by the supplier can be posted to. This is only encouraged where the supplier is not a Booking Supplier, i.e. a sundry supplier, and will never be paid for bookings-related expenses, e.g. phone company, landlord etc.
It is never recommended that booking expense GL Accounts be attached to booking suppliers. When these fields are left blank, the system will automatically post expenses to the default booking expense Account(s) setup via menu Home > System > Code Setup > INI Settings > Financials (GL Settings), which will allow Bookings expense analysis to be made. Supplier expense analysis can be performed using the Financial Analysis reporting tools, regardless of GL Account postings.
Payment Terms 1 / Payment Terms 2
There are two fields which make up the payment terms for the supplier. The first is a numeric value which is either a) a number of days or b) a date in the month depending on which setting is chosen from the drop-down list in the second field. Combined, these are used to calculate the payment due date of a suppliers invoice transaction. The available options are:
|
No. or Date |
Condition |
Example (20) |
|---|---|---|
| nn days | Prior to travel | 20 days prior to travel |
| nn days | After travel | 20 days after travel |
| nn days | After invoice | 20 days after invoice |
| nn days | Prior to sevice | 20 days prior to service |
| nn days | After invoice entry | 20 days after invoice entry |
| Date | of following month | 20th of following month |
| Date | of current month | 20th of current month |
Deposits Enabled
When checked, the Deposit Terms and Deposit amount fields become live.
Deposit Terms 1 / Deposit Terms 2
This combination of integer and drop-down field is used to determine if a deposit or pre-payment is required to be made to the supplier. If the Deposit Enabled box is checked, then the other fields are available for use. The first field is a numeric value that indicates the number of days that the second field describes.
The numeric value (nn) applies as follows:
|
No. of Days |
Condition |
Example (7) |
|---|---|---|
| nn days | Days prior to service | 7 days prior to service |
| nn days | Days after entry | 7 days after service entry |
Deposit Amount
If deposits are being used, a save cannot be performed unless all 4 deposit fields have values in them.
The deposit amount works in conjunction with the drop-down and can be either an Amount or a Percentage.
Value Condition Example:
- 100.00 - Amount Based - $100.00
- 10.00 - Percentage Based - 10% of the service cost
Bank Details
Bank / Branch / Account / Account Name
These fields can be used to store the Supplier bank account details. The Bank, Bank Branch and Bank Account fields can be output on supplier messages and as well, the Bank Account field can be used in an Electronic Payment file.
NOTE: Tourplan can generate an output file that can be processed through bank software. To use the EFT payment feature, the banks EFT file processing software and the necessary internet connections to the bank are required. Not available in all countries.
Local Bank Details
Bank / Branch / Account / Account Name
These fields can be used to store Local Supplier bank account details. The Local Bank, Bank Branch and Bank Account fields can be output on supplier messages and as well, the Local Bank Account field can be used in an Electronic Payment file.