Seat in coach services will require one product per service, i.e. one product for a return service and another product for a one way service. Speak with your trainer or local Tourplan Support office to understand the options available to you when inserting your SIC services.
Product Definition: Seat in coach transfers, or point to point transfers which offer a per person price per trip, way, or transfer.
Seat In Coach - Screen Overview
Example: Transportation - SIC
Price Rules Tab
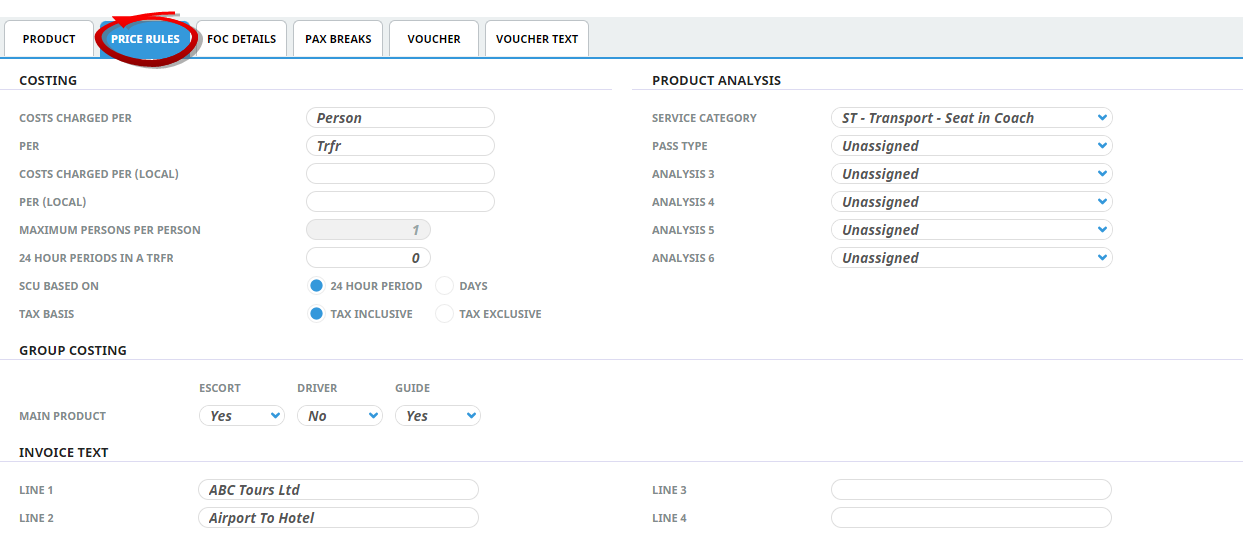
The Price Rules for the Transport hold the First & Second Charge Units (Per Person, Per Trip/Transfer) and the maximum persons per person is an unavailable field. If the transfer or trip is the same day (i.e., not overnight) then the 24 hour periods in a transfer is left as 0.
The procedures below are tailored to inserting Seat in Coach transportation services.
Create Seat In Coach Product
The first step to inserting product is to create the shell of the product into the database. The procedures which follow on from this procedure allow further details to be inserted for this product.
Insert a Transfer (SIC) Product
-
Select menu
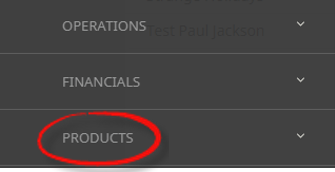
 Home > Products > Product Setup.
- Click the Home Menu to expand it:

- Click the Products menu option to expand it:

- Click Product Setup to go to the Product Setup menu:

- Click the Home Menu to expand it:
-
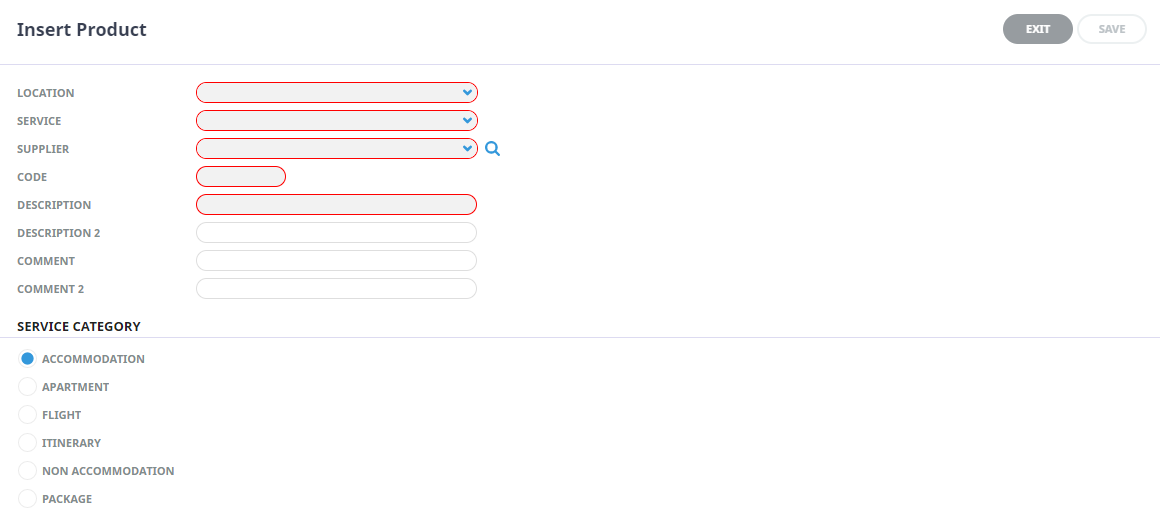
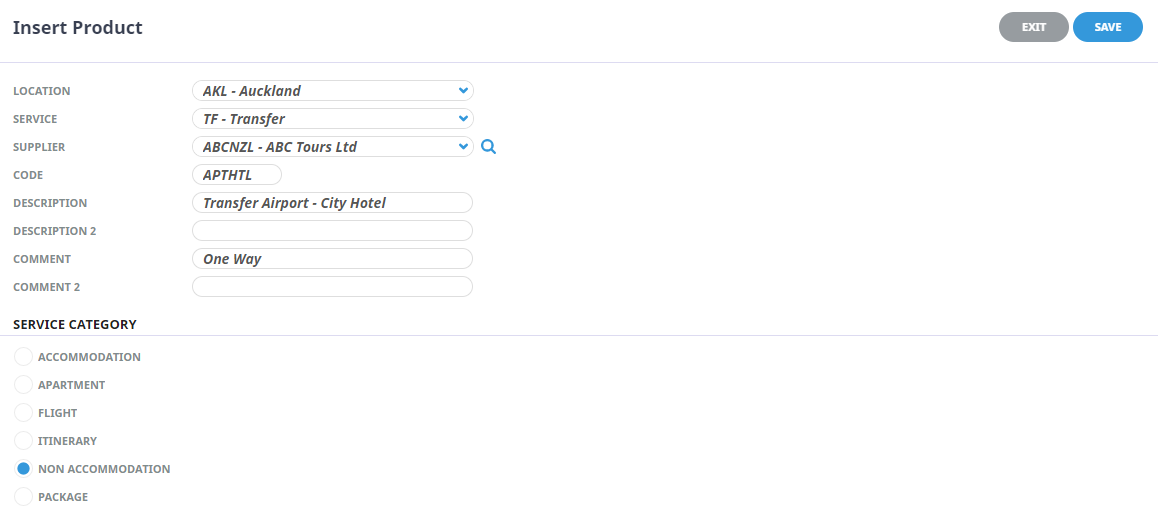
ClickCreate New Product.

-
On theInsert Product screen, enter data into fields (the top three are drop-down selection fields - entries must already exist before you can select them). Refer to Seat in Coach for more information on the data you can enter.
-
Check thecompleted screen.
-
ClickSave to keep the changes.

-
ClickExit to discard any changes.


Field Selections
Location
Select a location code from the drop-down list, or type the location code. Location codes must already be setup in the Code Setup application, Create a Product Location.
Service Type
Select a service code from the drop-down list or type the Service Code. Service codes must already have been setup in the Code Setup application, Create a Product Service Type.
Supplier
Select a supplier from the drop-down list, or type the Supplier Code. Suppliers must already be setup in the Creditors application, Create a Supplier.
Code (Autocaps)
Enter a Product Code. Examples of commonly used codes are:
- Non-Accommodation
- Codes for transfers should try to convey what the transfer is - INTCYH = International Aiport - City Hotel etc. One way Transfers; APTHTL, HTLAPT, or if there are Zone Transfers ZONE1, or Zoned Return Transfers Z1RTN.
Service Category
The product must have one of these radio buttons checked. The service category determines what data pre-populates some of the setup fields and enables the system to use logic specific to the category to correctly generate pricing.
| Radio Button | Definition |
|---|---|
| Non-Accommodation | Meals, Transfers, Sightseeing, Coach Transport, Rental Cars etc. |
Price Rules
Price Rules settings identify how the service is to be sold, for example per 'person' per 'transfer', per 'person' per 'way'. Additional settings can be defined such as if the Tax is inclusive or exclusive when sold.
Insert Price Rules
- Make sure the product has already been created (see Insert an Accommodation Product).
- If the product is not already displayed, retrieve it (see Searching for Products or Suppliers).
- Identify the tab containing the fields you need to modify for the product. For this example, click the Price Rules tab.
-
Add details to thePrice Rules Tab fields.
Feel free to add your own price rule configurations.
-
To keep the changes, clickSave.

-
ClickDiscard to discard all changes.

NOTE: A same day transfer would have the number of hours in a 24 hour period left set at 0.
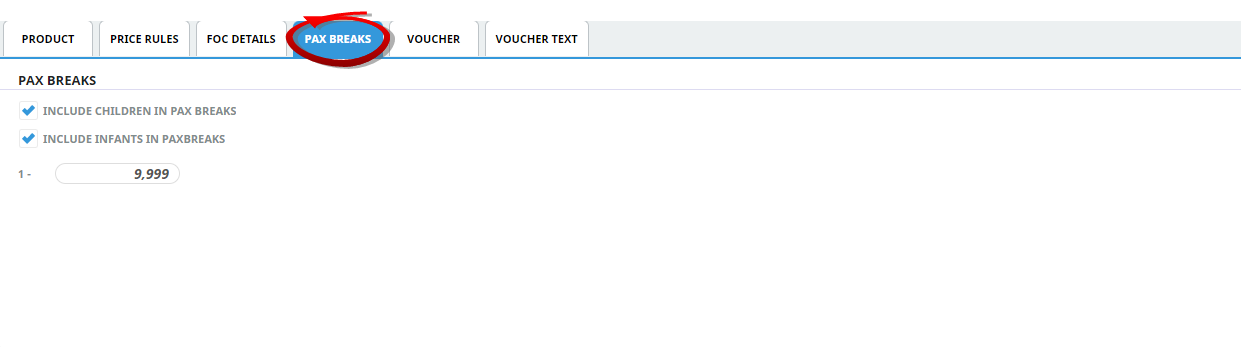
Pax Breaks
Consideration for supplier transportation policies is provided within the Pax Break Tab. The main purpose for (SIC) transfer services is to understand if children or infants require a seat when purchasing this service. If they do require a seat and need to be included in the total booking count, the check box to 'Include Children (and/or Infants) in Pax Breaks' will need to be selected.
Insert Pax Breaks
- Make sure the product has already been created (see Insert an Accommodation Product).
- If the product is not already displayed, retrieve it (see Searching for Products or Suppliers).
- Identify the tab containing the fields you need to modify for the product. For this example, click the Pax Breaks Tab.
-
Add details to thePax Breaks fields.
-
To keep the changes, clickSave.
-
ClickDiscard to discard all changes.
Product Pick up Drop off Localities
The Product Pick up Points menu allows alternative locations and addresses to be stored against products that have multiple pick-up and drop-off locations eg: Tour pick up locations.
Creating Pick Up and Drop Off Points
- If the supplier to which replicated locations are to be added does not exist, create the supplier first (see Create a Supplier).
- If the supplier does exist, search for the supplier from Product Setup, select menu Product Details > Pickup Points.
-
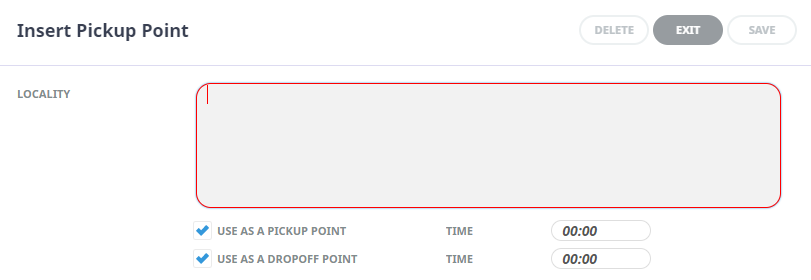
ClickInsert to add a new entry.

-
Enter theLocality information and use the check boxes to assign if the locality can be used as a pick-up point and/or drop-off point and click OK to keep changes.
-
ClickSave to keep the changes.
-
ClickExit to discard any changes.
A full list of Localities will display for this product and you can review/amend the details by double clicking on the locality.
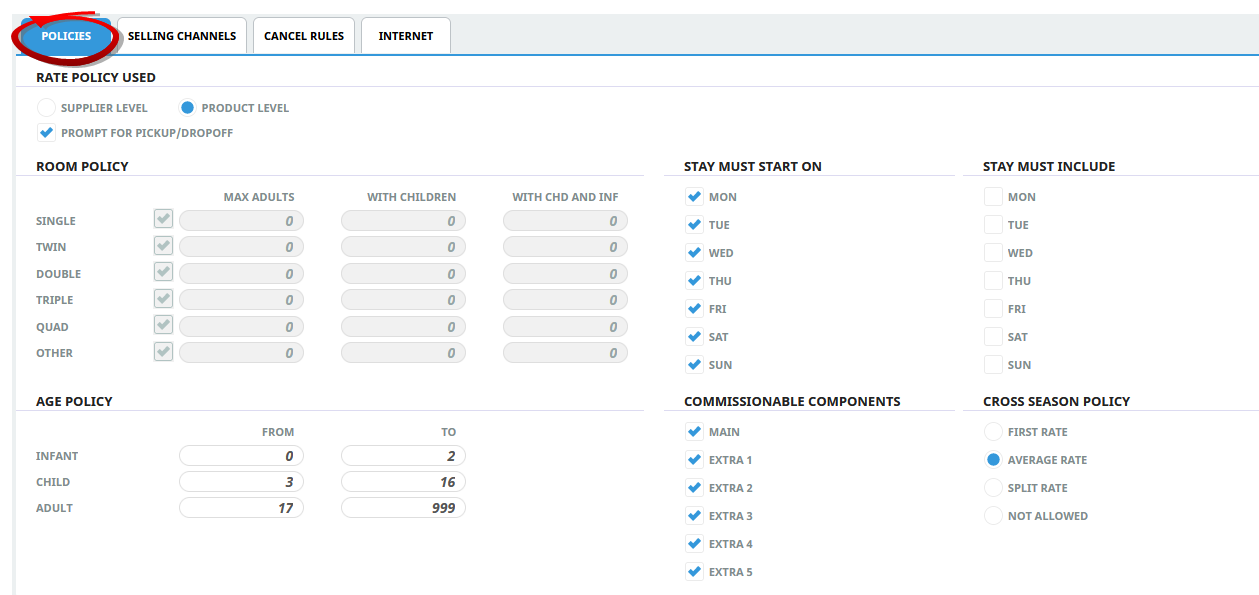
Policies
If age policies for children and infants were the same for every service offered by the supplier, we would recommend defining age policies at a supplier level. However, if the supplier offers distinct age differences for individual services then it would be preferable to set the age policies at a product level.
Insert Product Policies (or View Supplier Policies)
- Make sure the product has already been created (see Insert an Accommodation Product).
- If the product is not already displayed, retrieve it (see Searching for Products or Suppliers).
- Identify the tab containing the fields you need to modify for the product. For this example, click the Policies Tab.
-
Add details to thePolicies Tab fields.
-
To keep the changes, clickSave.
-
ClickDiscard to discard all changes.
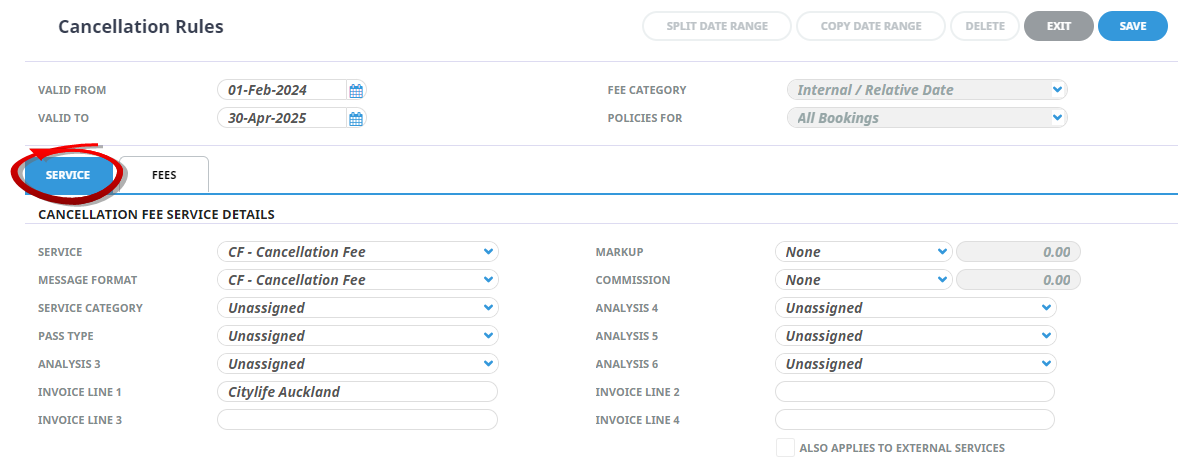
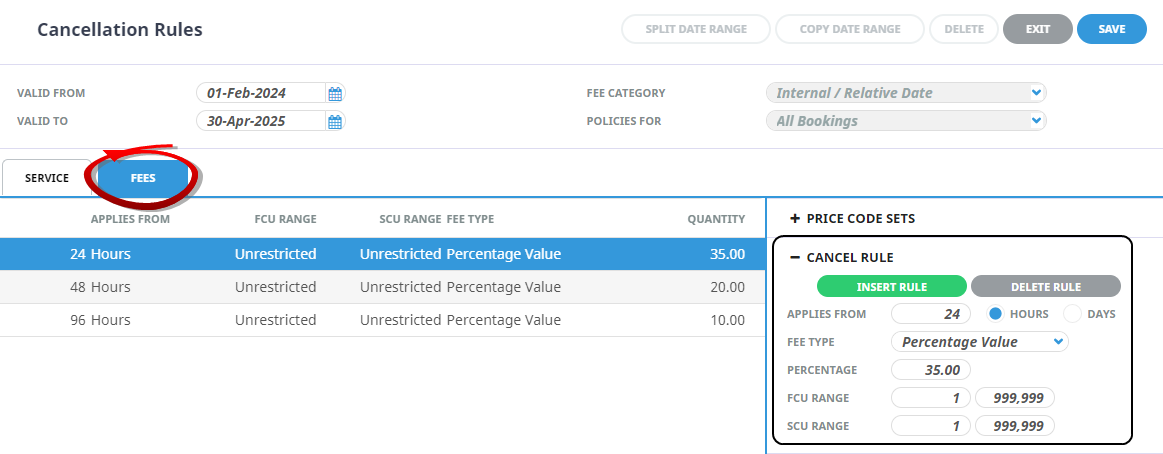
Cancellation Rules
Cancellation rules can be inserted at the product level (offering differing cancellation rules per service) or at the supplier level (for all services linked to the supplier).
Define Cancellation Rules
- Make sure the product has already been created (see Insert an Accommodation Product).
- If the product is not already displayed, retrieve it (see Searching for Products or Suppliers).
- Identify the tab containing the fields you need to modify for the product. For this example, click the Cancel Rules Tab.
-
ClickInsert to add a new entry.
-
On theCancellation Rules screen, enter Valid From/To dates, select if the type of date in the rule is Relative or Fixed and the type of bookings the policy is for.

-
TheService Tab will be open on screen, enter the Cancellation Fee Service Details fields.
-
Click theFees Tab and enter the Cancel Rule information.
-
ClickInsert Rule to save the rule, and insert a new rule.

-
ClickOK to keep the changes and save or update the entry.

-
ClickDelete to remove the entry and/or discard any changes.

-
ClickExit to discard any changes.
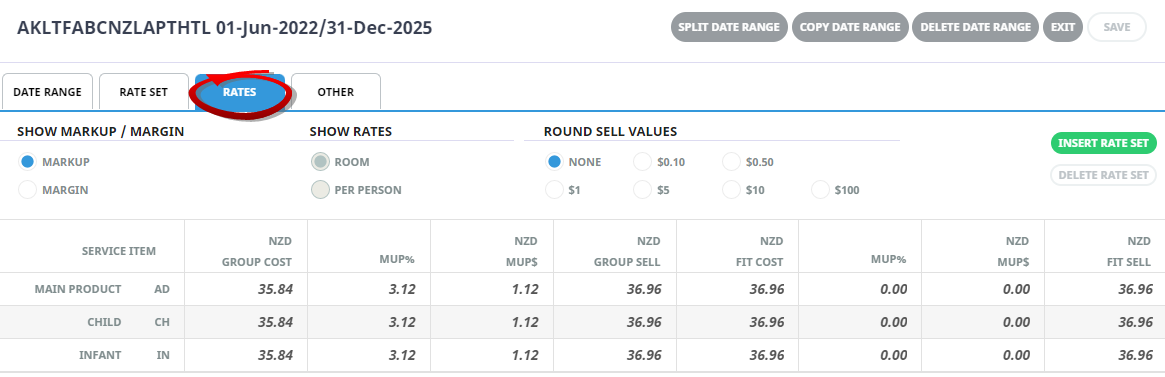
Rates
There are 4 Tabs which allow specific rate information to be stored per date range.
- Date Range - How is the rate is sold? Are there specific sales periods? Will the rate be a gross rate or a nett rate? Are there any taxes which need to be defined against the rate?
- Rate Set - Are there any stay length (minimum/maximum stay) requirements? Does the rate apply for specific days? Is the rate a confirmed rate?
- Rates - The rates tab is where the rates are defined.
- Other - Allows accommodation services to include specific stay pay rules.
Per person prices are inserted into the rates screen. If there are child and infant prices they can also be inserted here for automated pricing when the service is selected in a booking.
NOTE: Child and infant ages will need to be defined in the supplier or product policies screen and the children's ages will need to be defined in the booking header for correct pricing.
Row Headings - Non Accommodation Products (Display Only)
For non accommodation products, the first row will always display 'Main Option'.
Extras
For both Accommodation and Non Accommodation products, any Extras that have been defined in the Product tab (see Add Product Detail) will display, with separate rows that allow for (AD)ult, (CH)ild and (IN)fant costs to be entered against them.
NOTE:
- In the example being created, the 'Net Rates' price code will have no markup attached at this level; i.e. the cost and sell rates for both Group and FIT rates will be the same. Markups will be applied when a different Price Code is added to the Date Range, or the Discount Commission Matrix will be used to apply the required mark-up.
- Remember when entering the rates, if tax is involved, then the values entered into these Rate fields must reflect the Tax Inclusive/Exclusive setting from the Tax Setting section. Taxes in general are discussed in more detail under (Set Date Range Information).